3D Vehicle Configurator
Lead Visual Designer
Our client, FCA USA, wanted a redesign of the vehicle configurator component to provide an immersive 3D experience of the vehicles to the user. This component allows them to visualize different options such as colours for different vehicles, both exterior and interior, as well as highlighting important key features of the vehicle.
The Ask
With the component, we were asked to improve on the following:
Restricted area around the vehicle
“Now, Make It Yours” being outside the desktop viewport.
We were tasked to include all of the required design elements and interactions within a 1450x750 desktop viewport. This ask challenged us to figure out how to include all of the features that are needed as part of this tool while giving the user most amount of free space to interact with the vehicle.
Before
After
Phase 1: UX Iterations
We did many rounds of ux iterations as well as working sessions to figure out what experience would help improve the component.
We came up with the following 3 experiences:
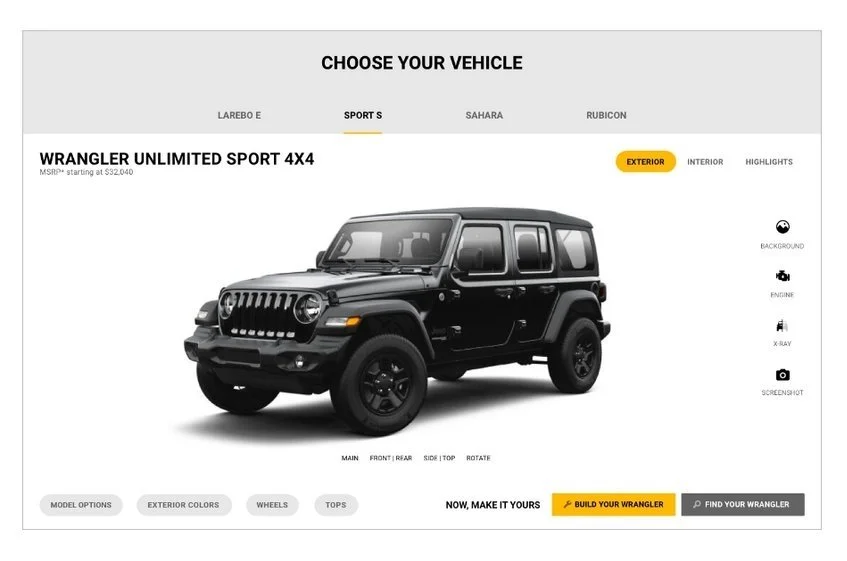
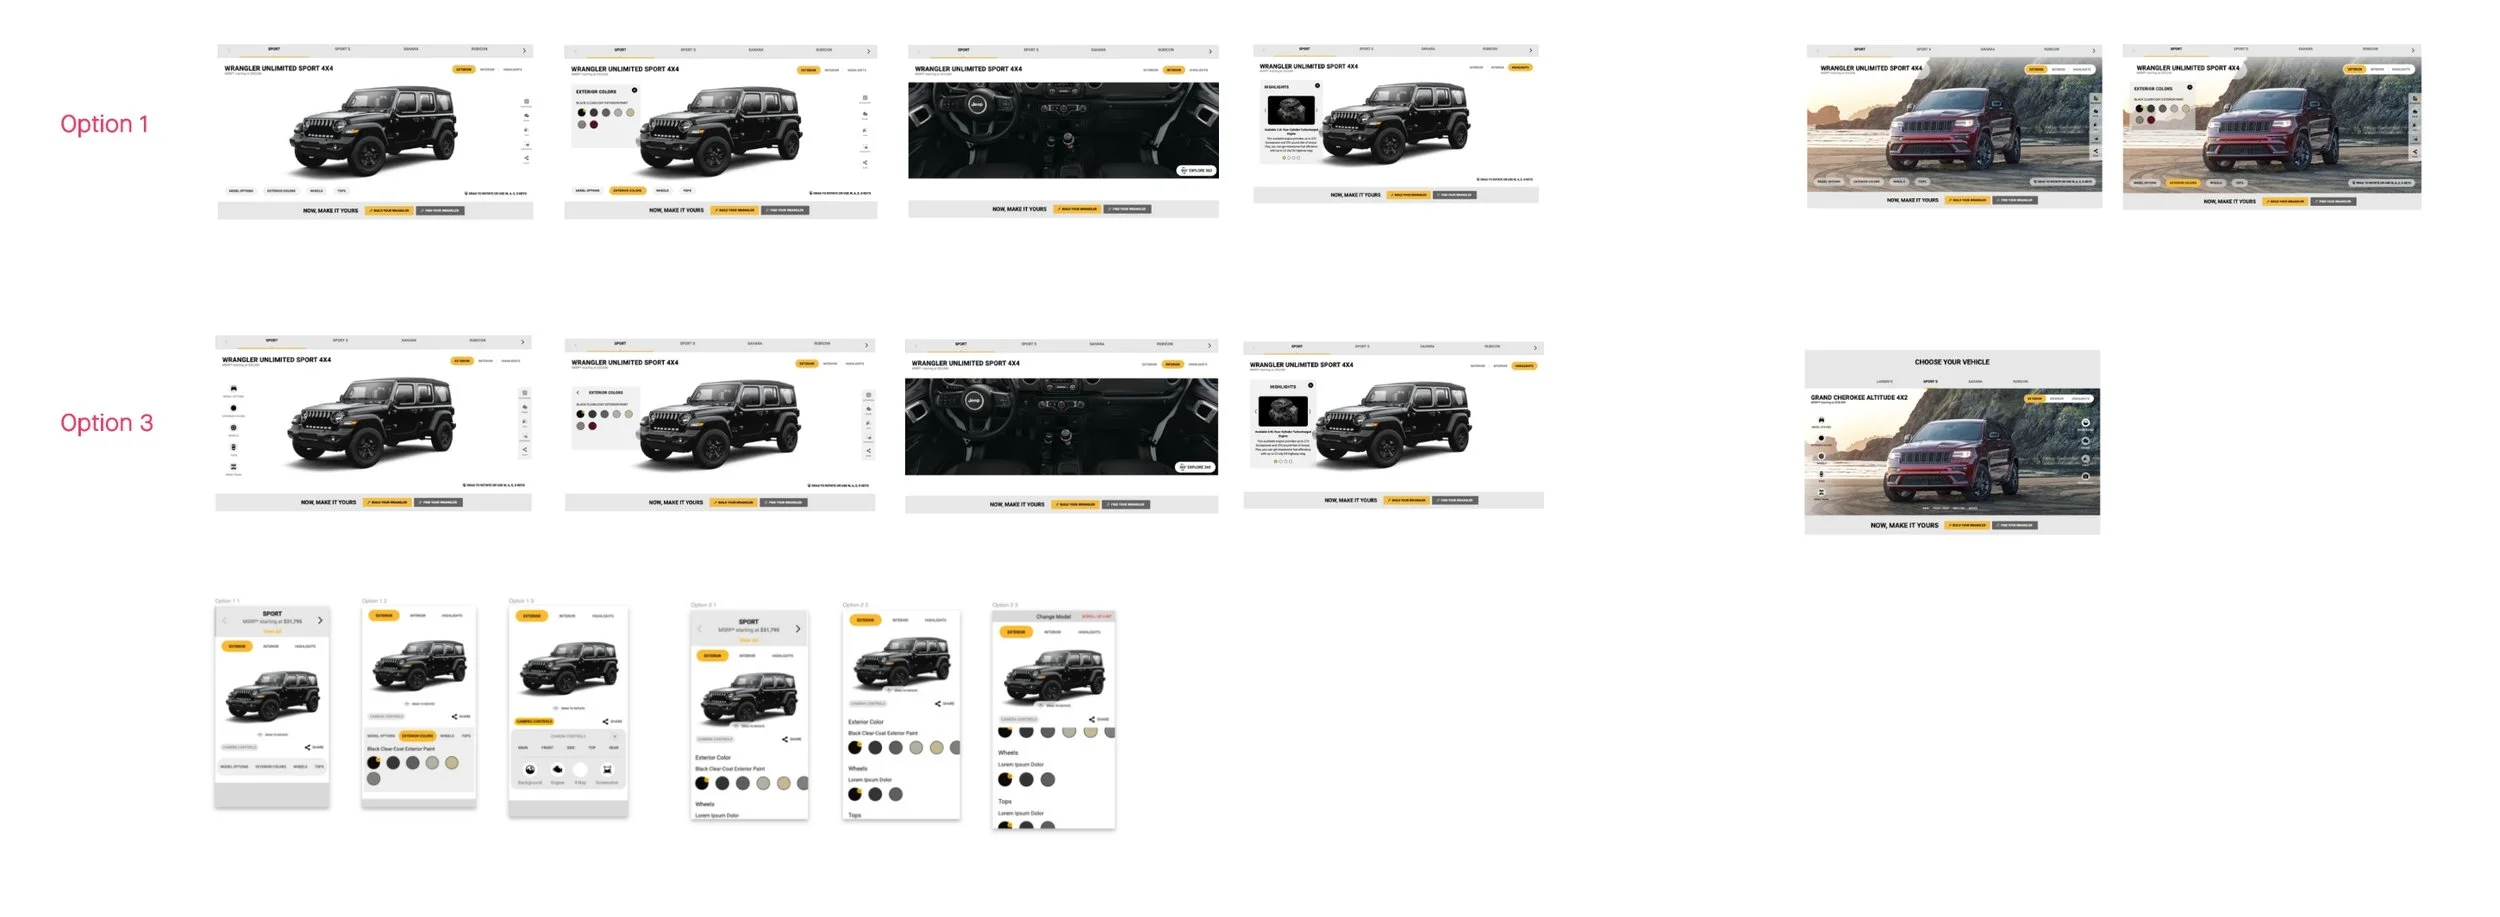
Option 1 - Buttons
Customization control buttons are at the bottom. Clicking on then displays a sidebar with options.
“Now, Make it Yours” CTAs are beside the most interacted buttons - customization controls
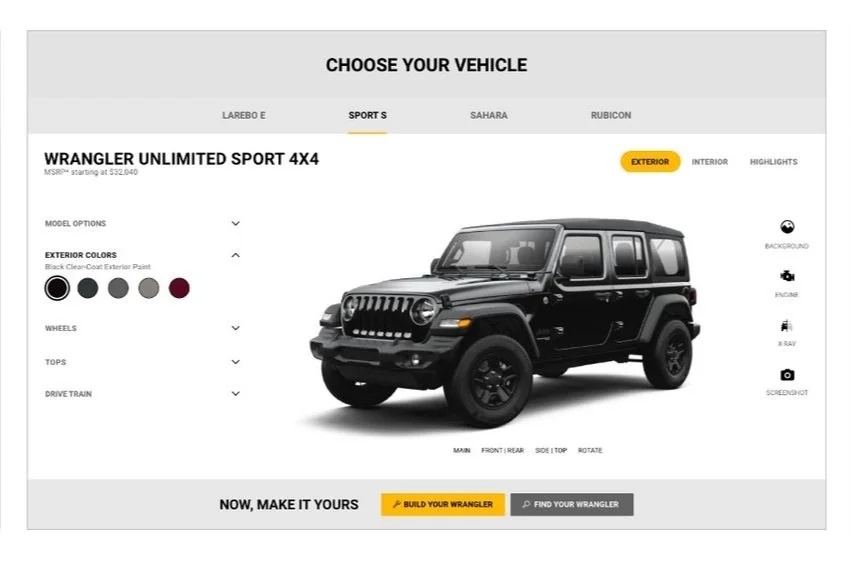
Option 2 - Accordion
Customization controls - accordion, are on the left at all times. Clicking on an accordion will open all the corresponding options.
“Now, make it yours” cta bar is at the bottom of the component encouraging the user to build it after the customization is finished.
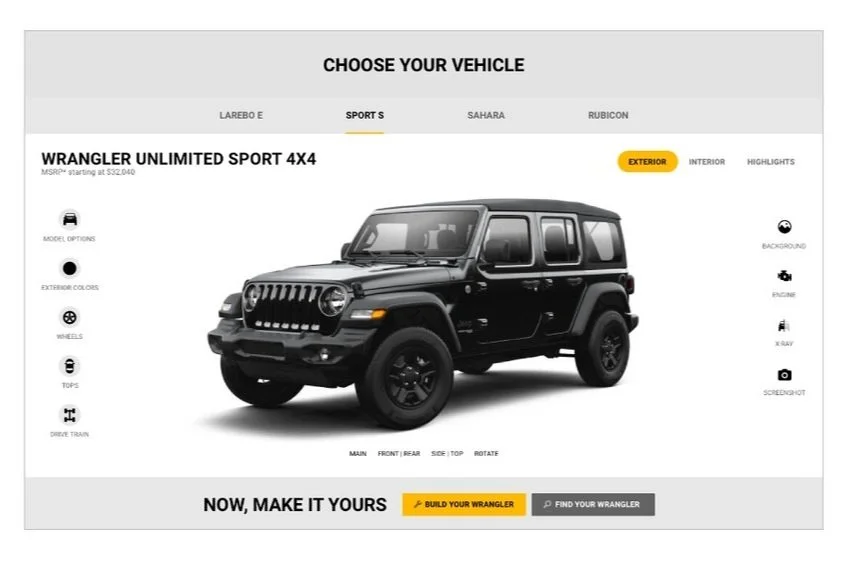
Option 3 - Icons with Labels
Customization controls, icons with labels, are on the left. Upon clicking on them, the controls will slide out of the screen and a floating box will slide in with options that may or may not be in front of the vehicle.
“Now, make it yours” cta bar is at the bottom of the component encouraging the user to build it after the customization is finished.
Challenge: since the user have the option to change the background to a lifestyle image, we knew the icon labels would not be accessible on those type of backgrounds and this was something we knew we would have to come back to to find a solution.

More UX Iterations
After we finalized on the different experience options, we went further into designing different instances to see which option works the best for all scenarios.
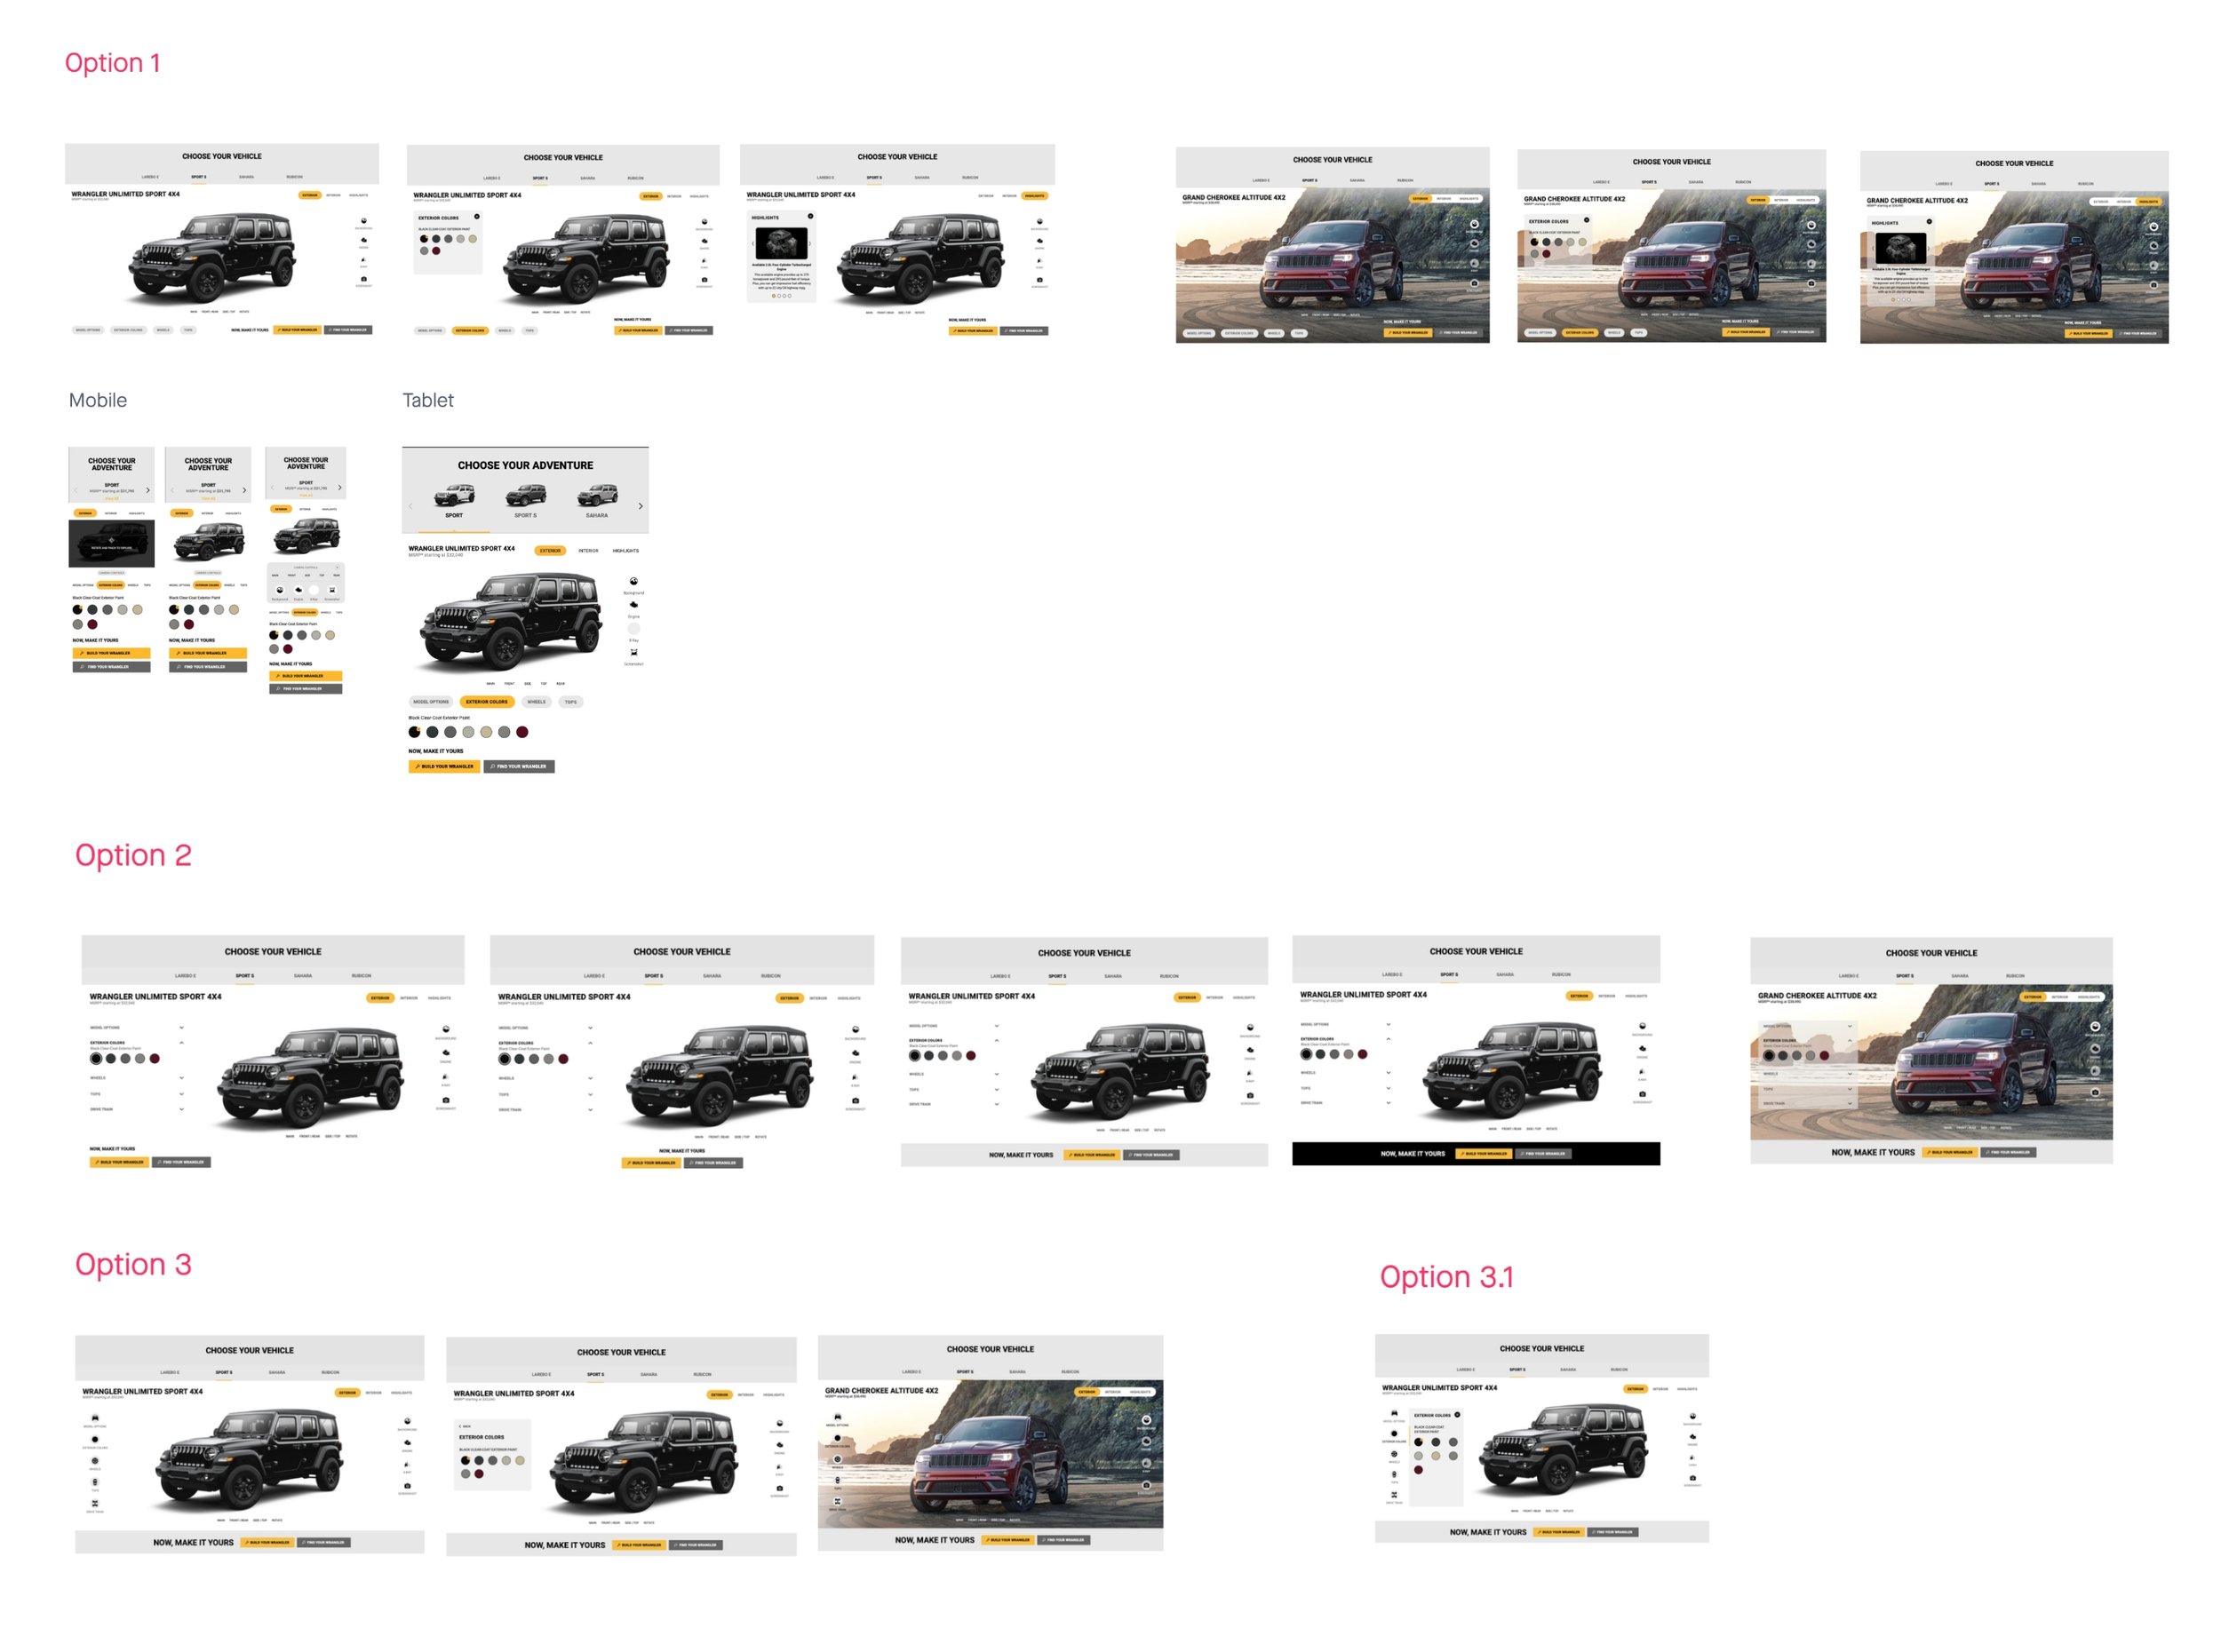
Upon further explorations, we decided option 2 - accordion, is the weakest and is not much of an improvement from the current experience.
Client Review
During the client review, we discussed on the following concerns we had for Option 3 - icons:
The user would have to go through too many clicks just to get through all of the vehicle customization options
Need to figure out how to make the icon labels accessible on lifestyle image backgrounds
Icons are too small to recognize and the labels are not readable and won’t be accessible on lifestyle images
Vehicle customization option buttons should have a stronger visual hierarchy
The clients and our team mutually agreed that the Option 1 - buttons, is the best approach.
Phase 2: UI Iterations
We took the experience of Option 1 - buttons, and began iterations to see what colours would work best for the customization controls to ensure the overall visual hierarchy of the component is correct.
This was a challenge because some brand colours would only work the best on the white studio background and some would only work on the lifestyle background.
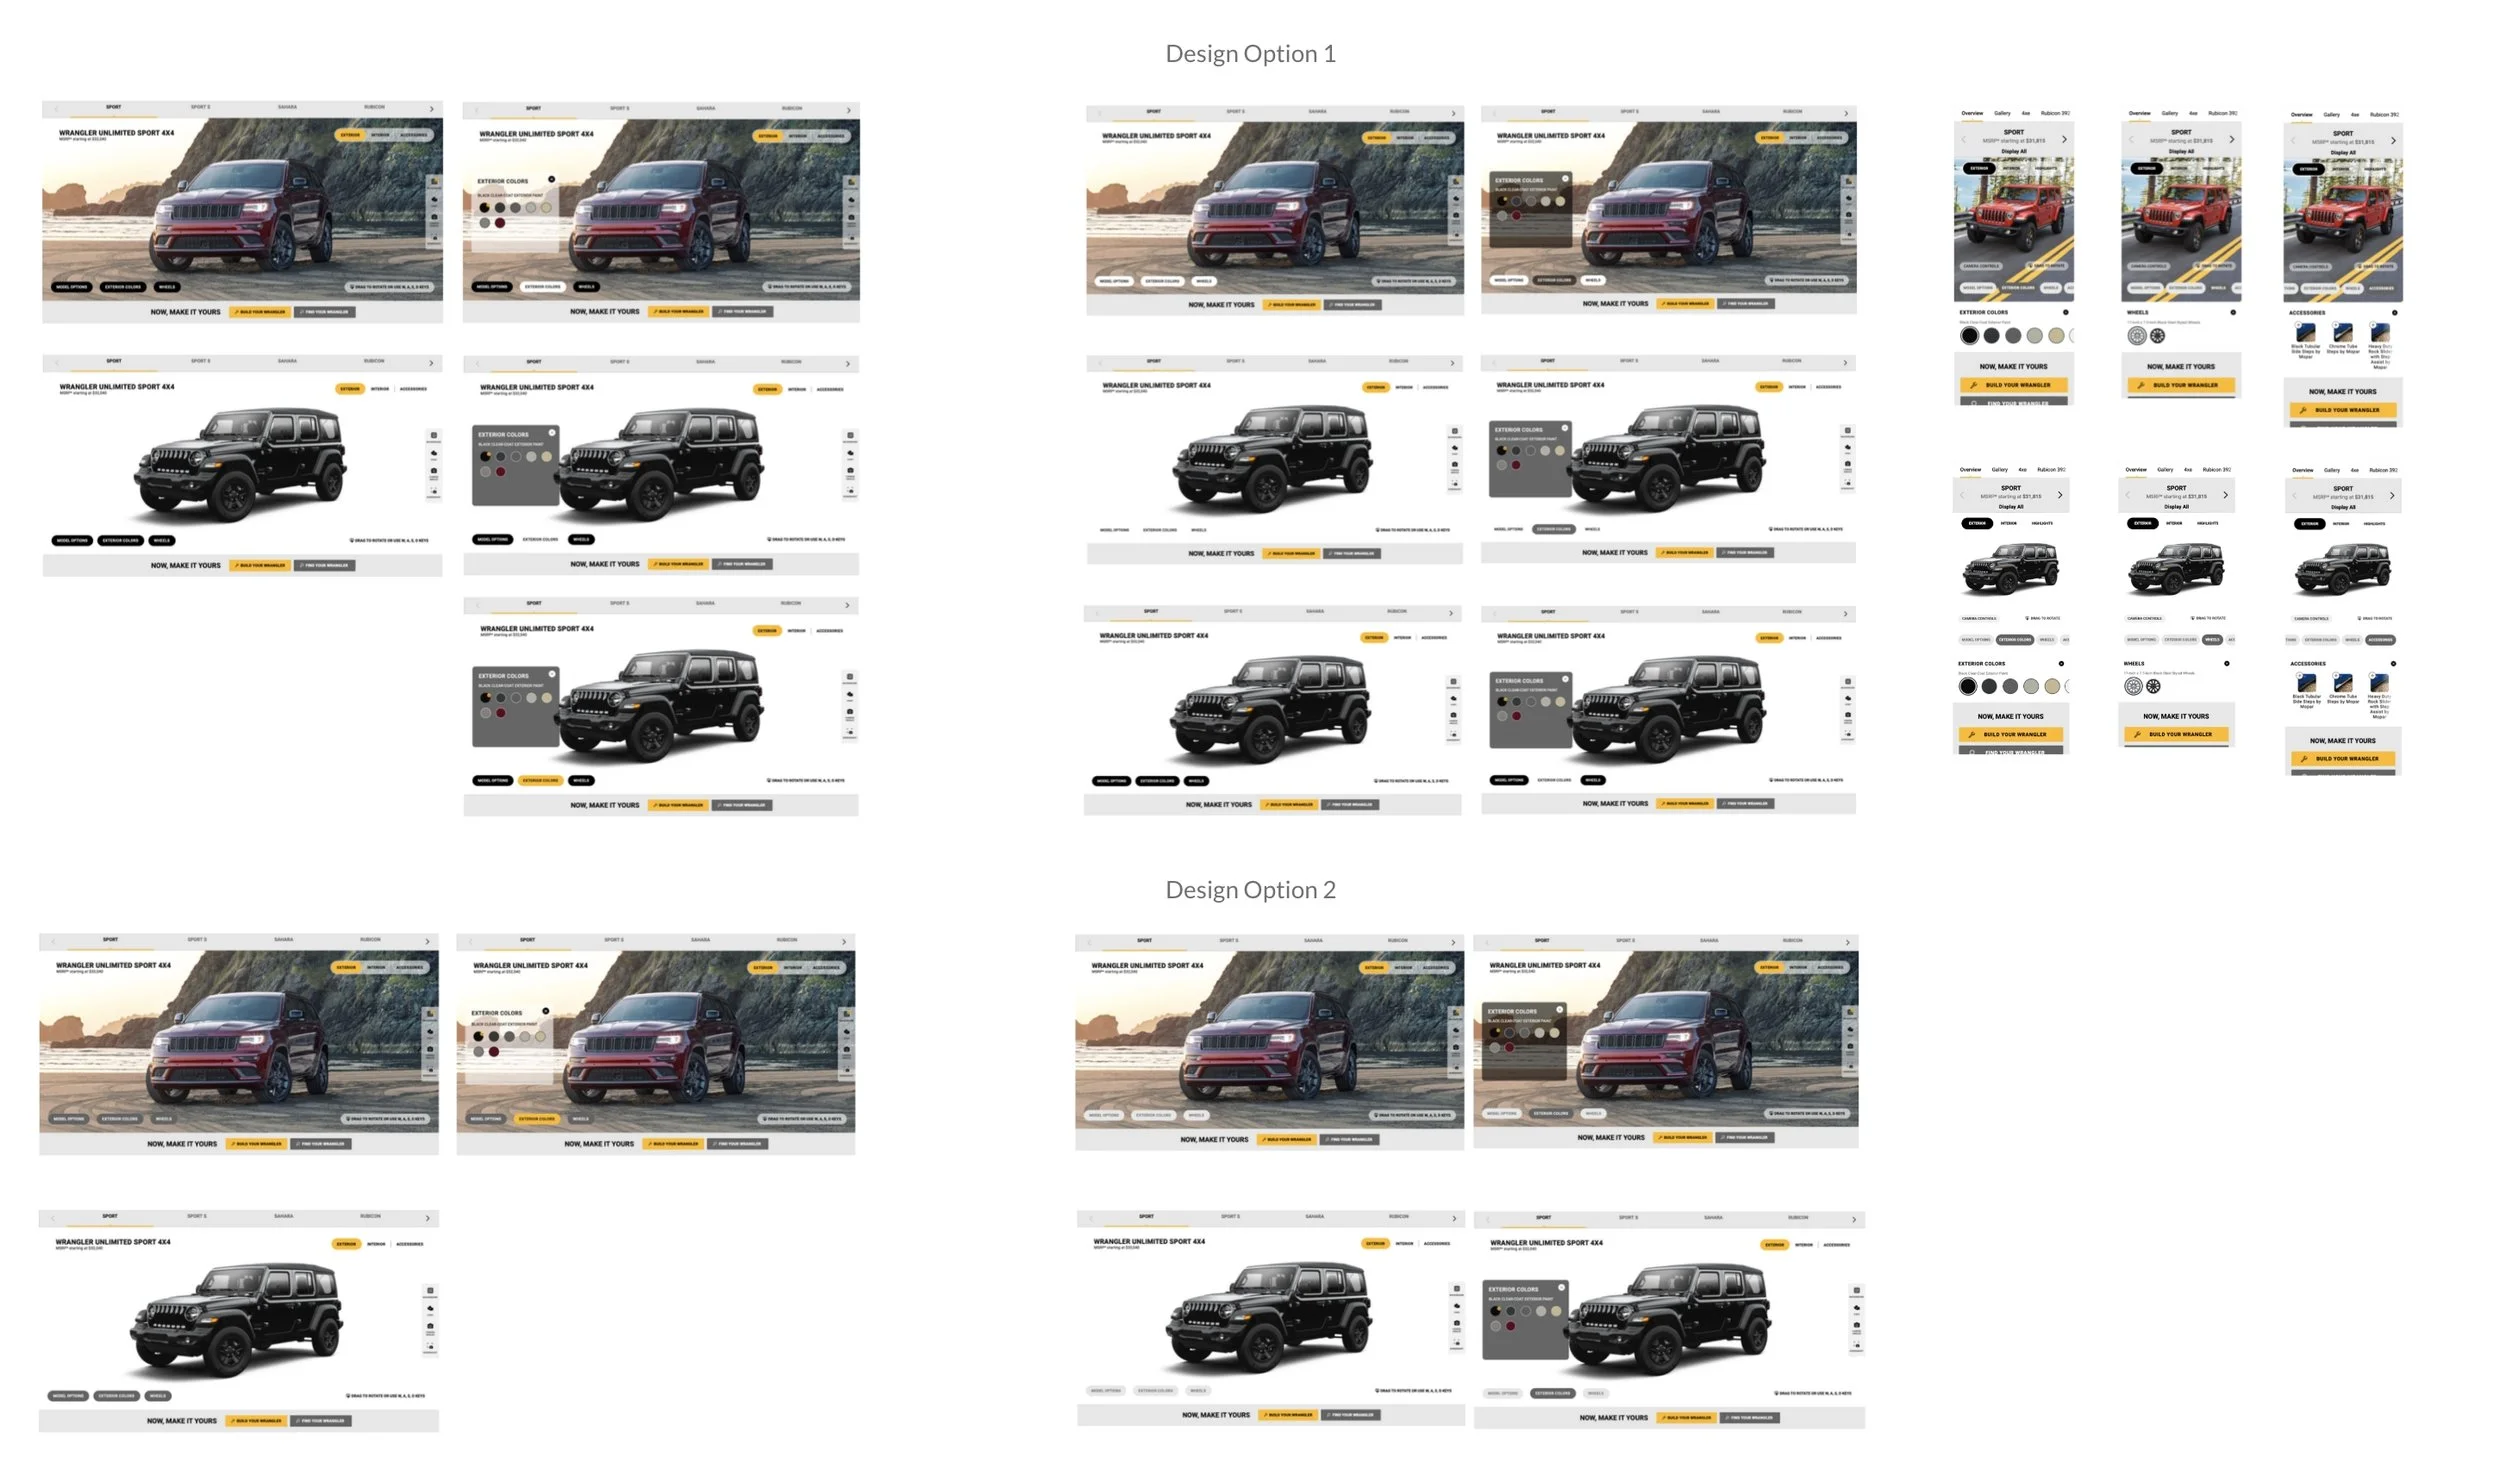
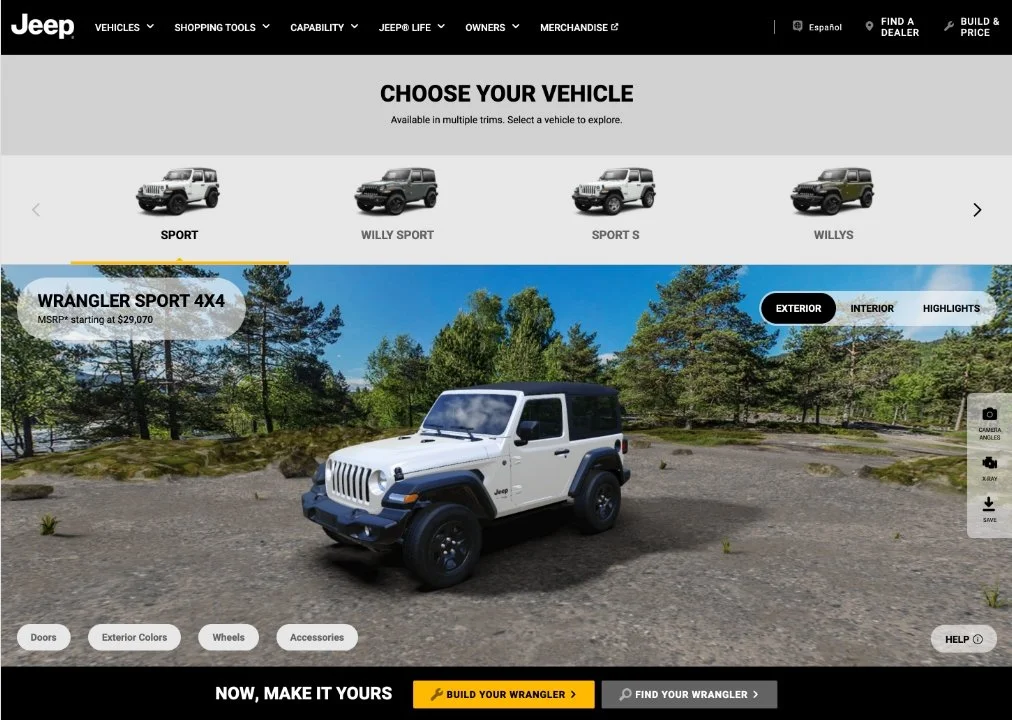
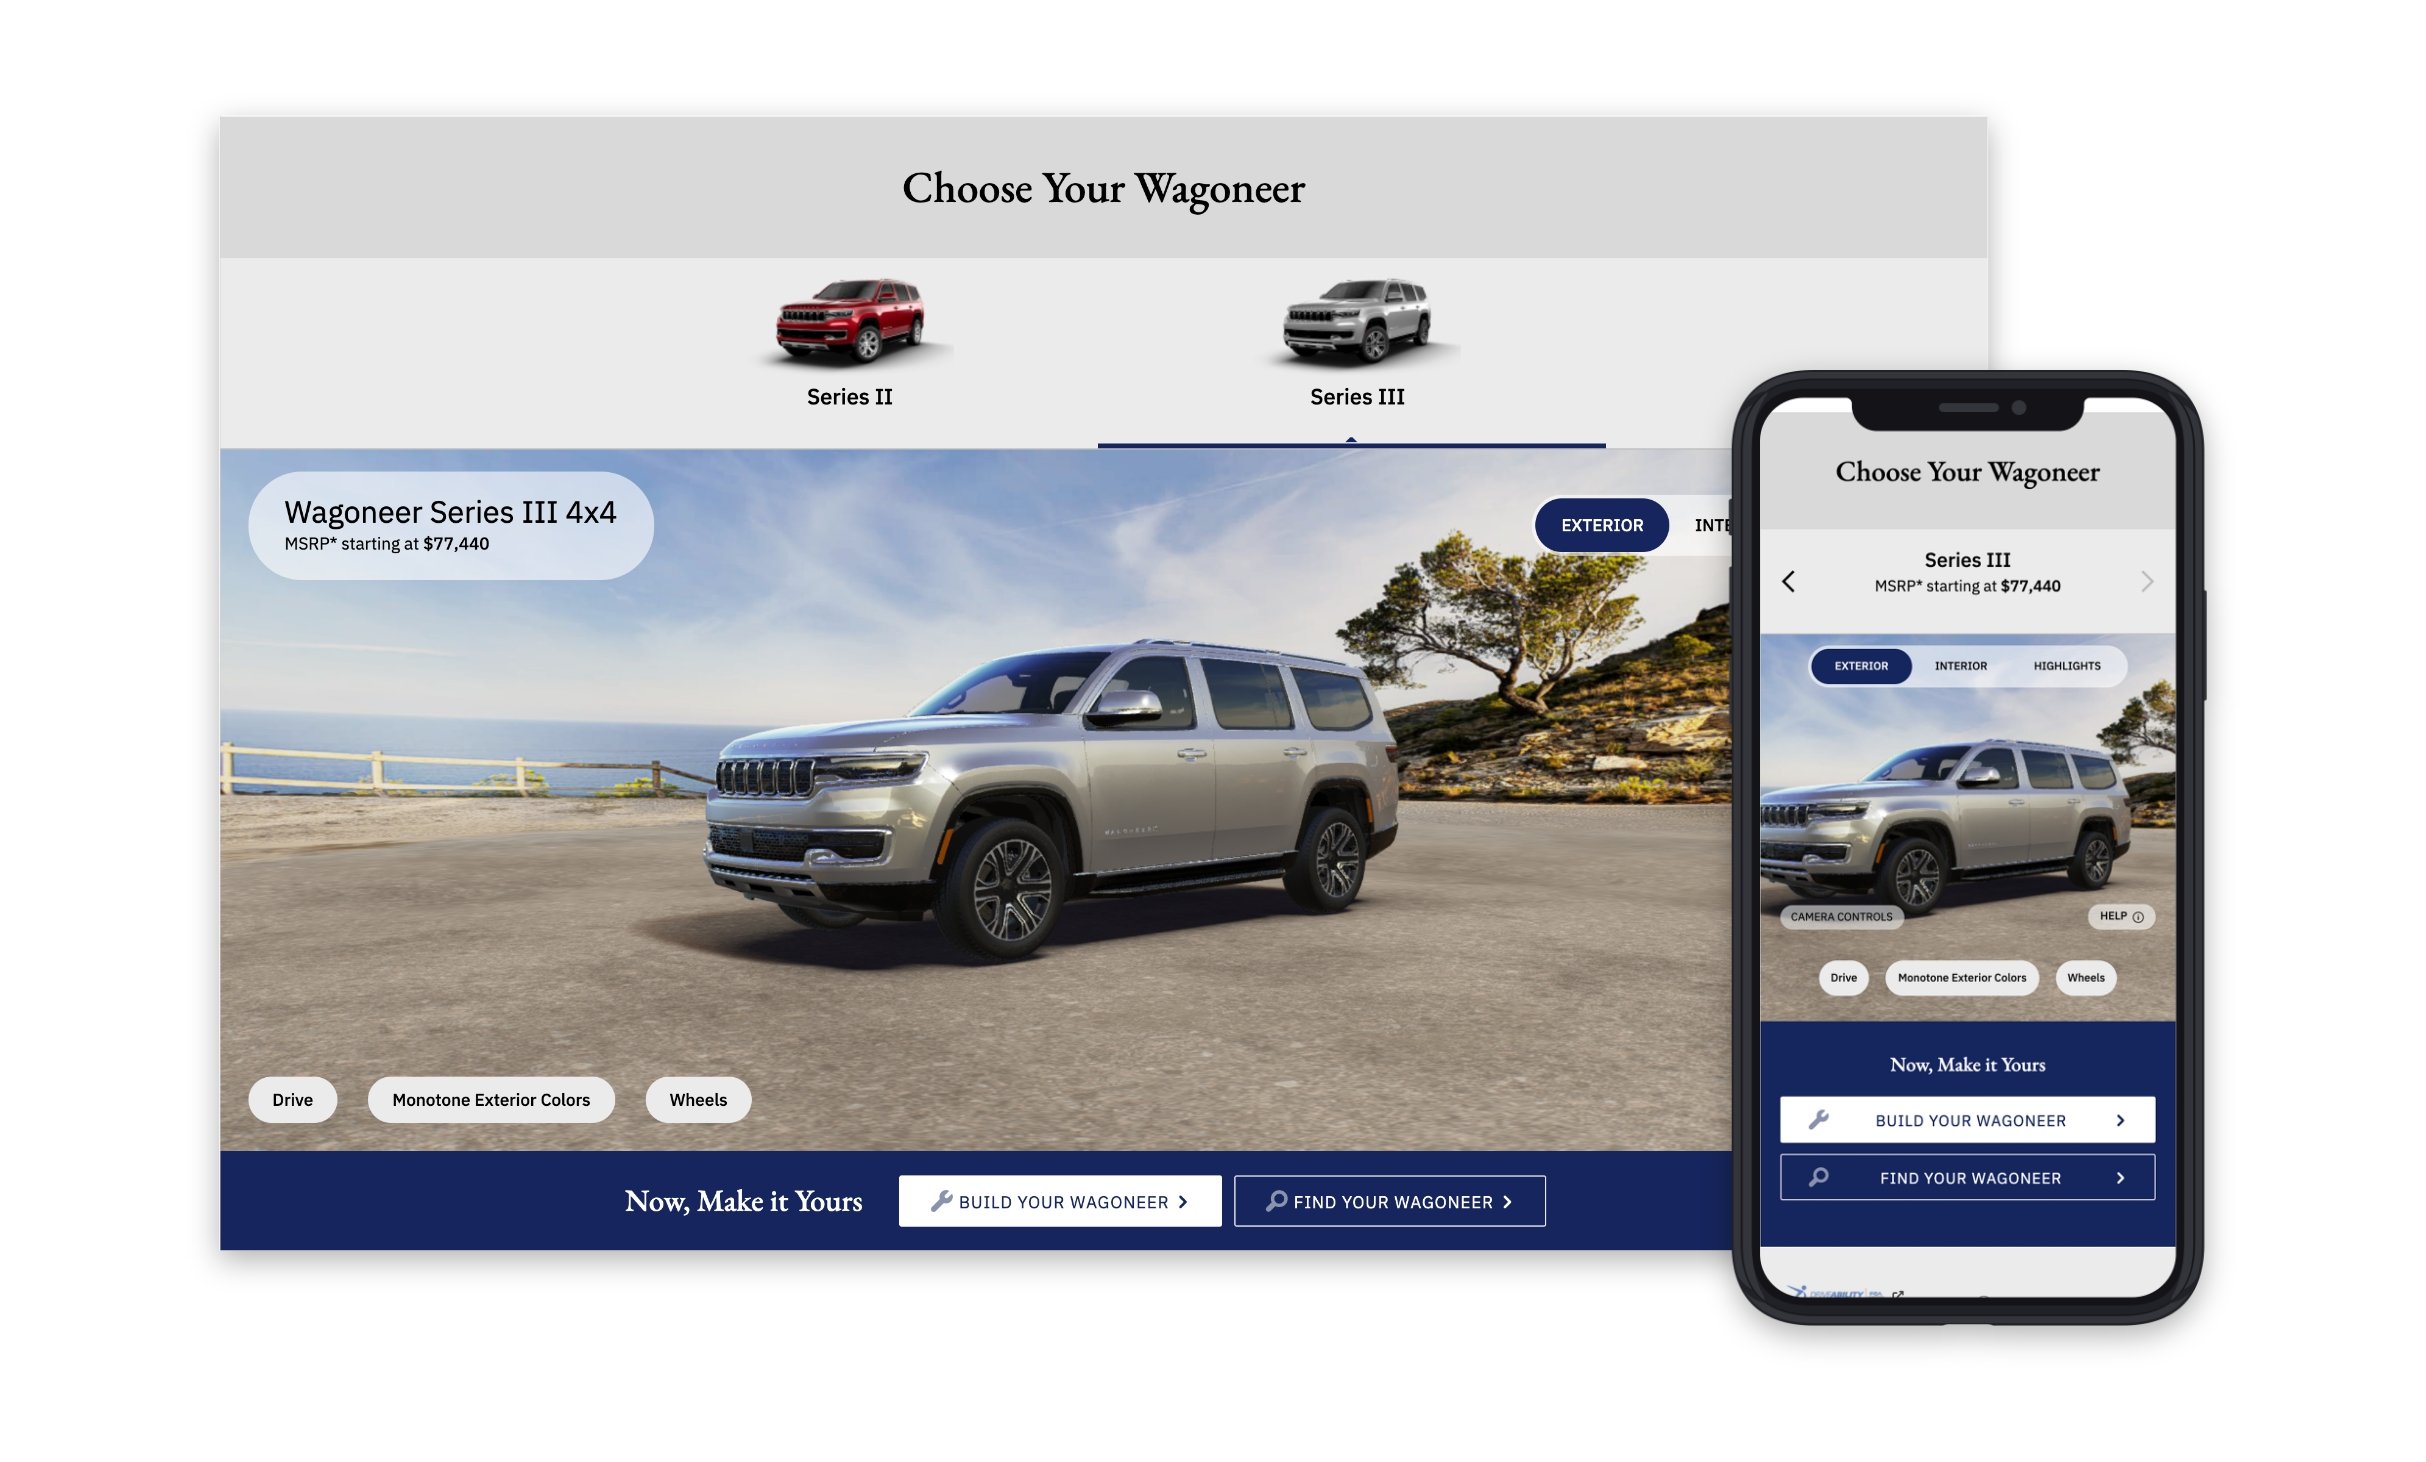
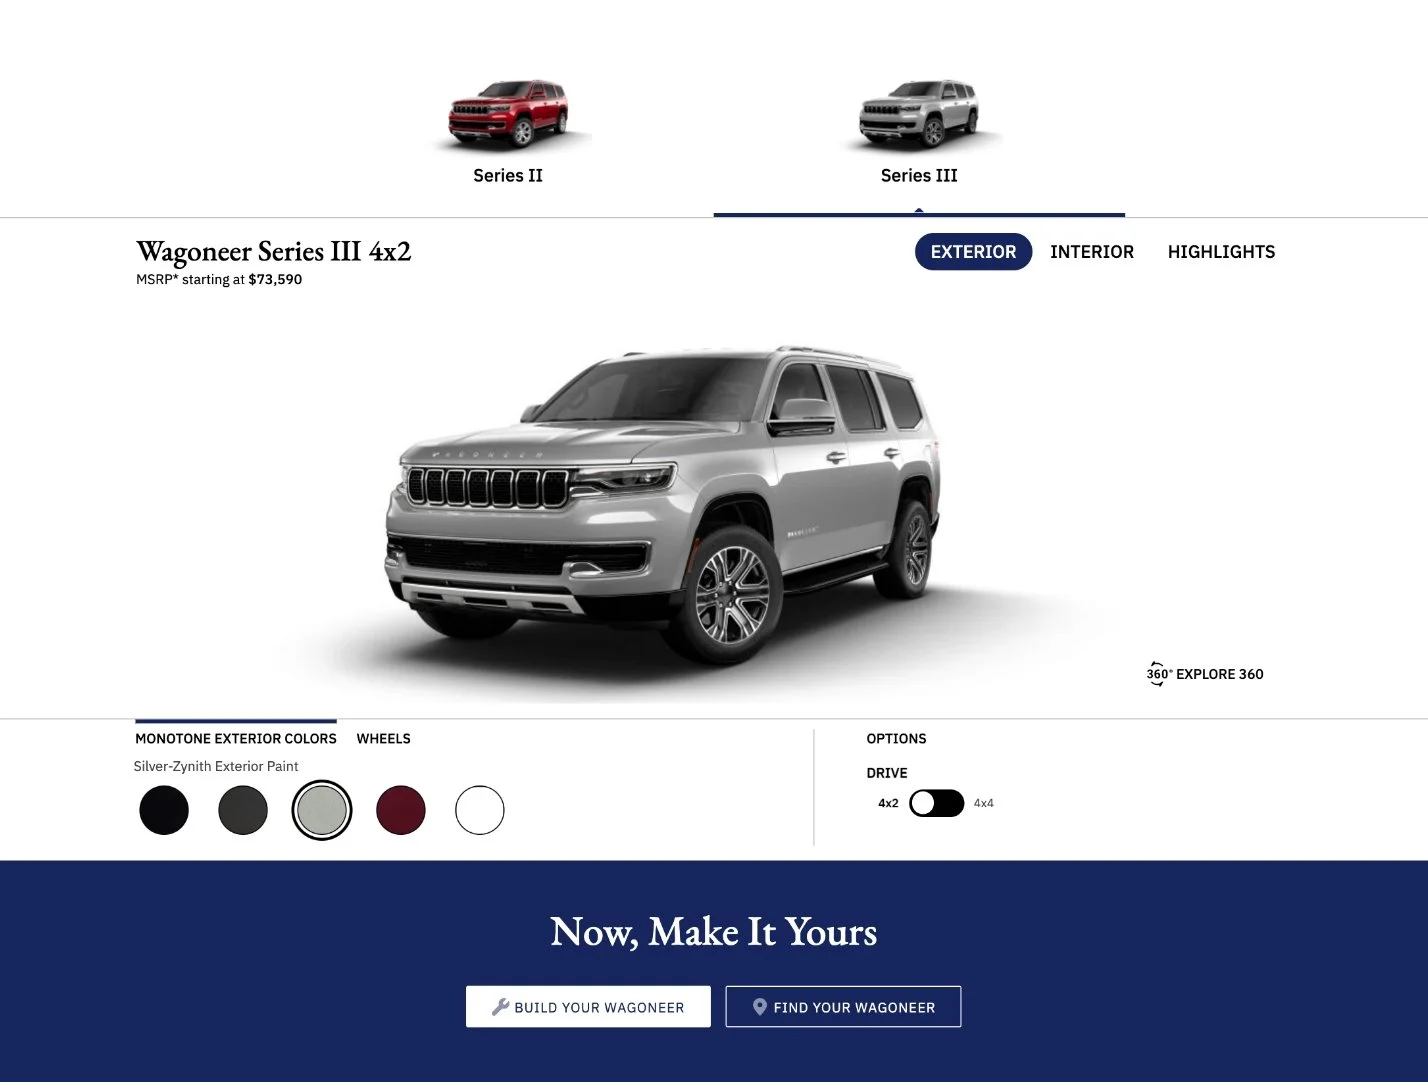
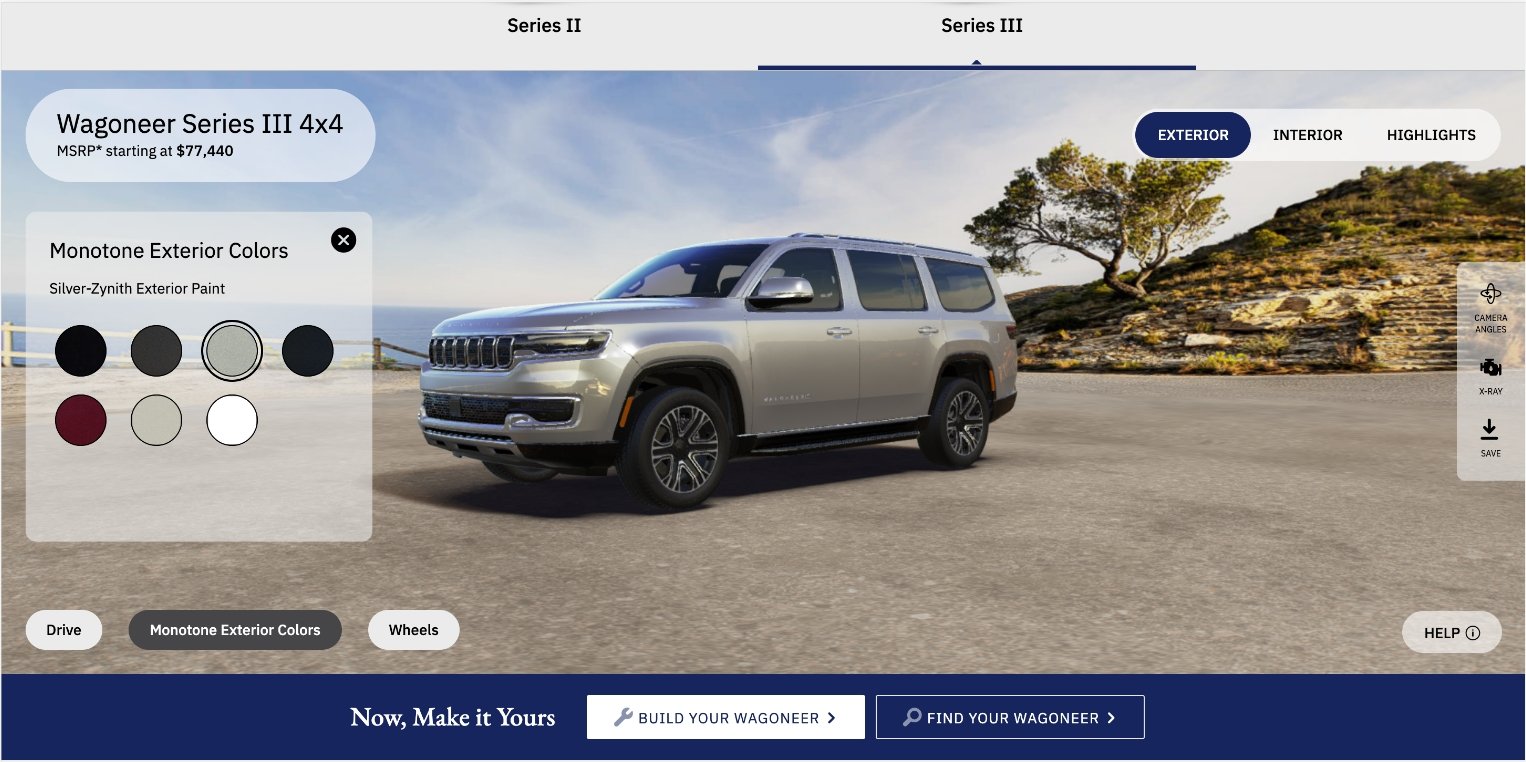
Final Design

Configurator: Different
Instances
We took the final design of the component and was finally able to finish designing the rest of the experience.
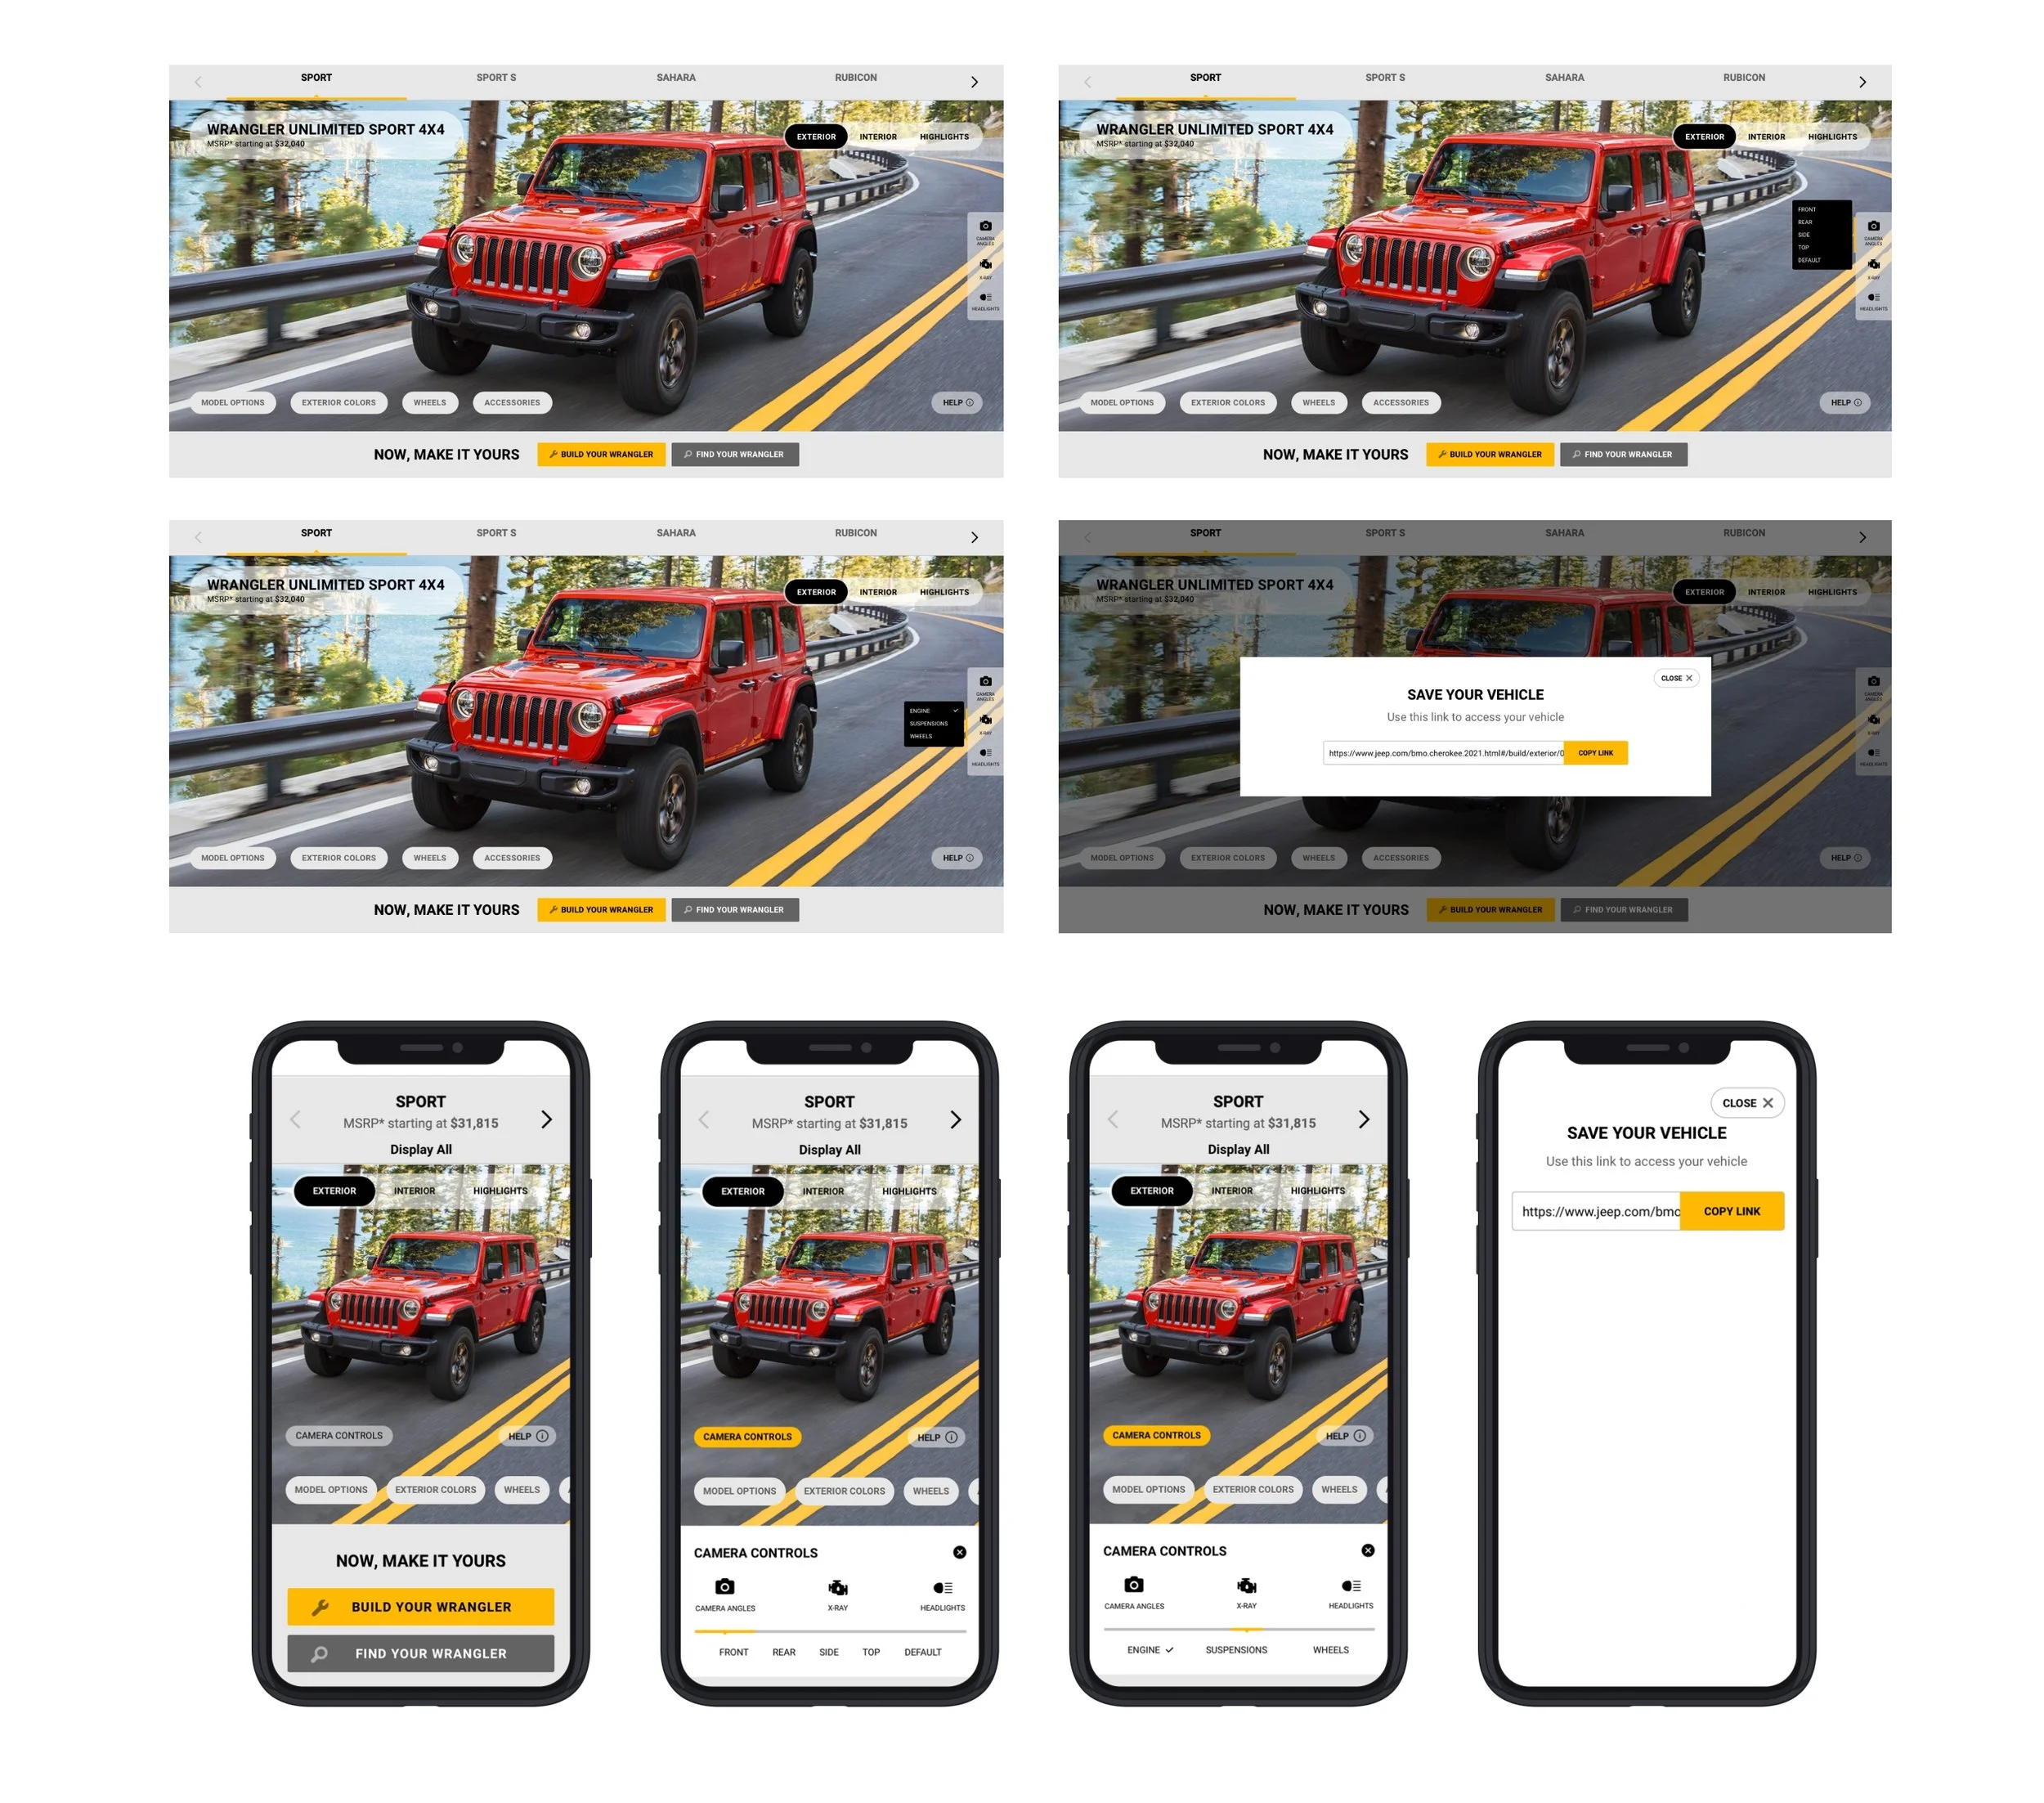
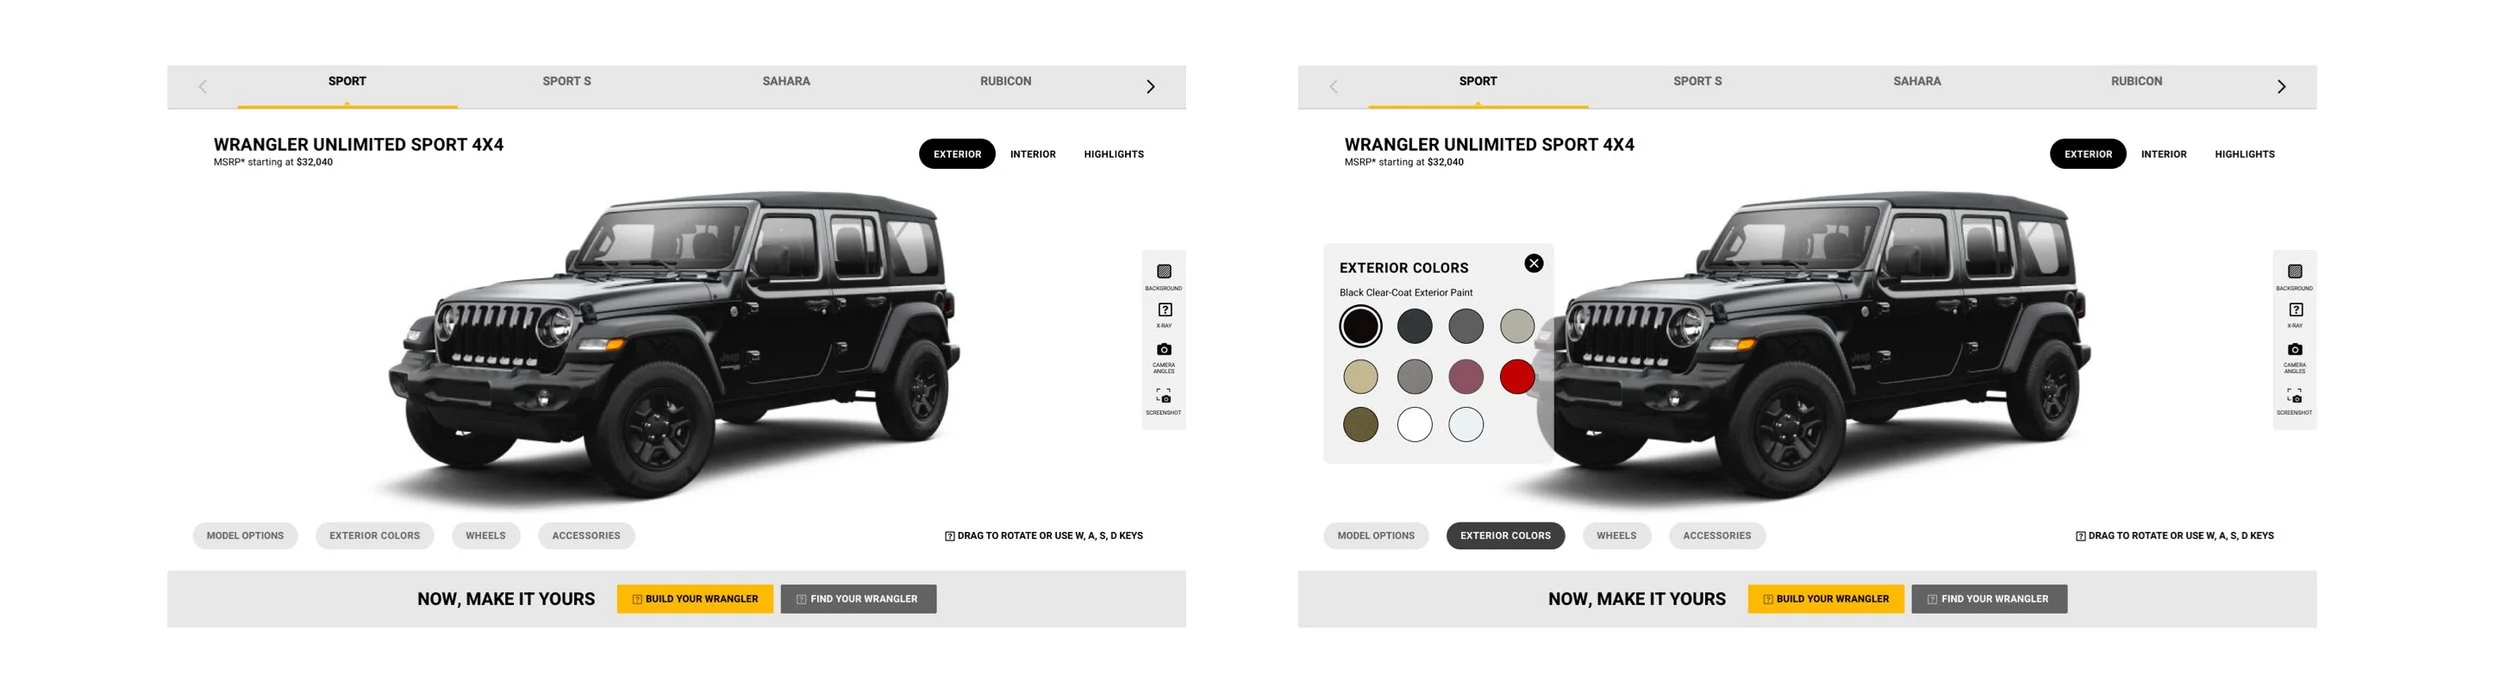
Exterior Configurator
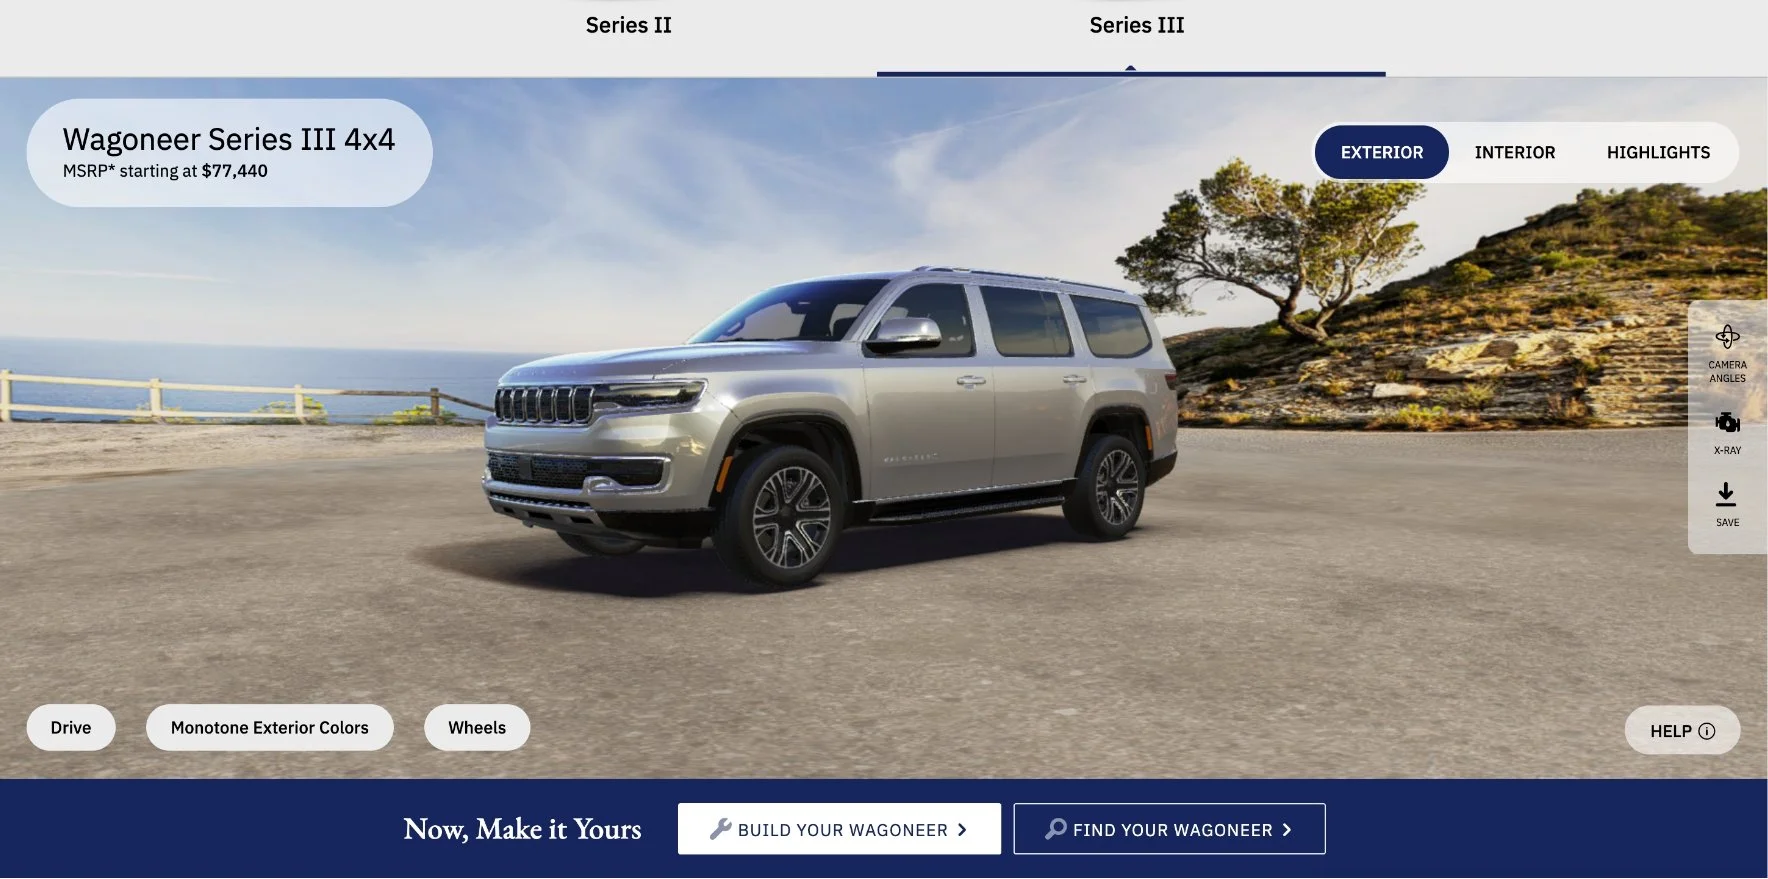
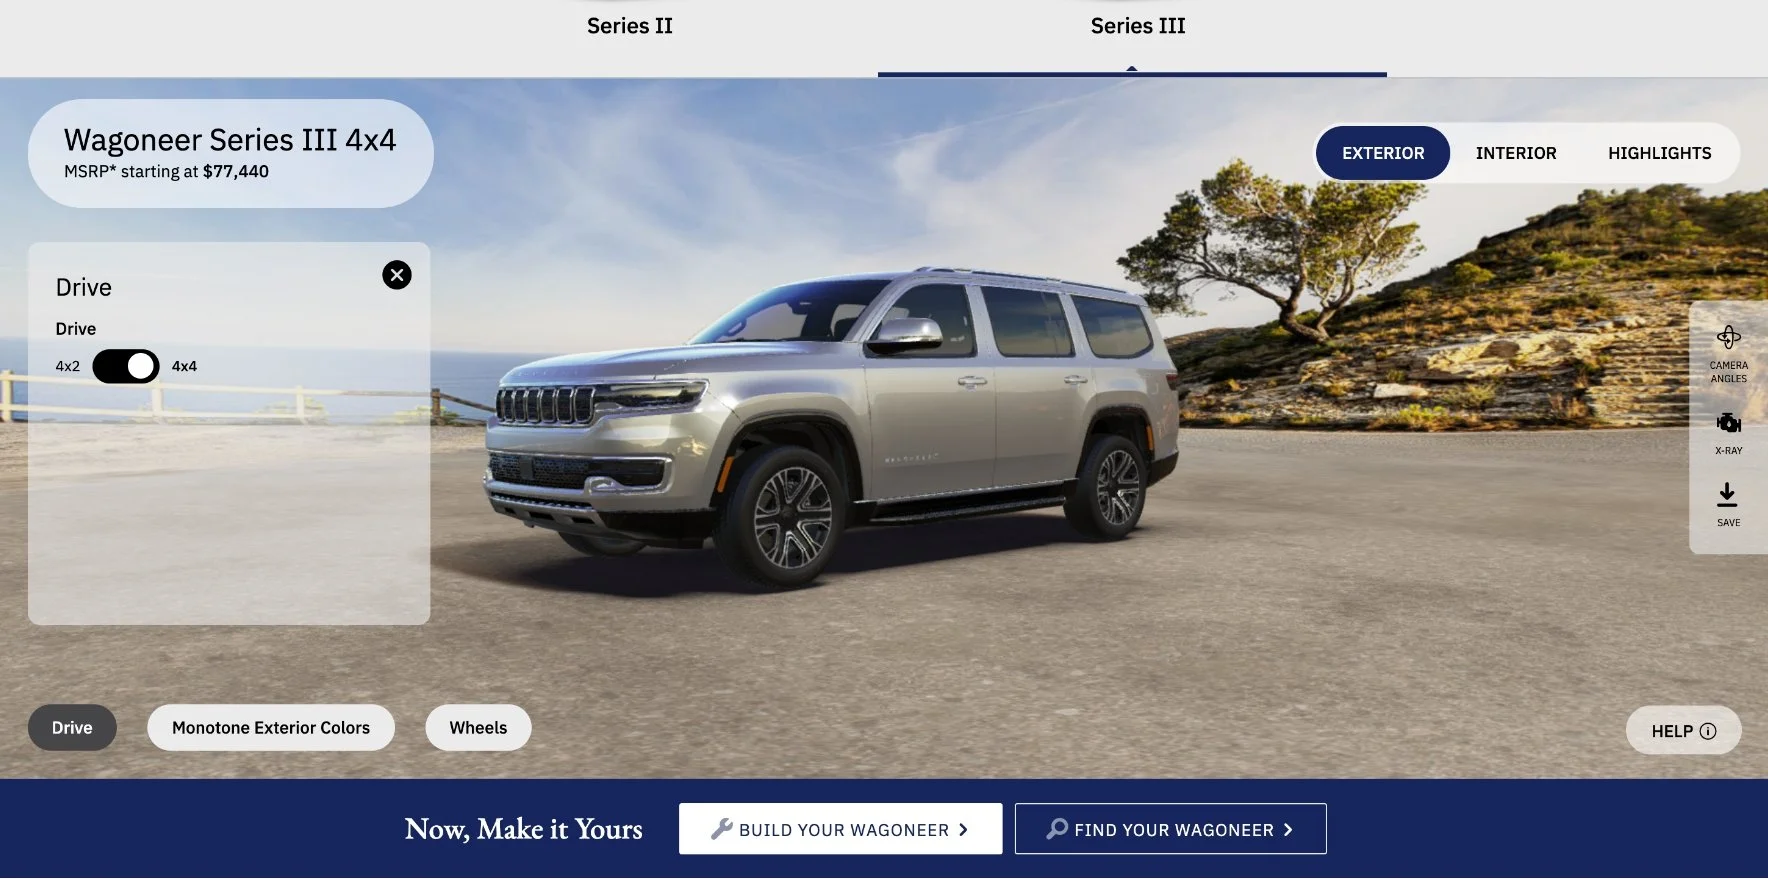


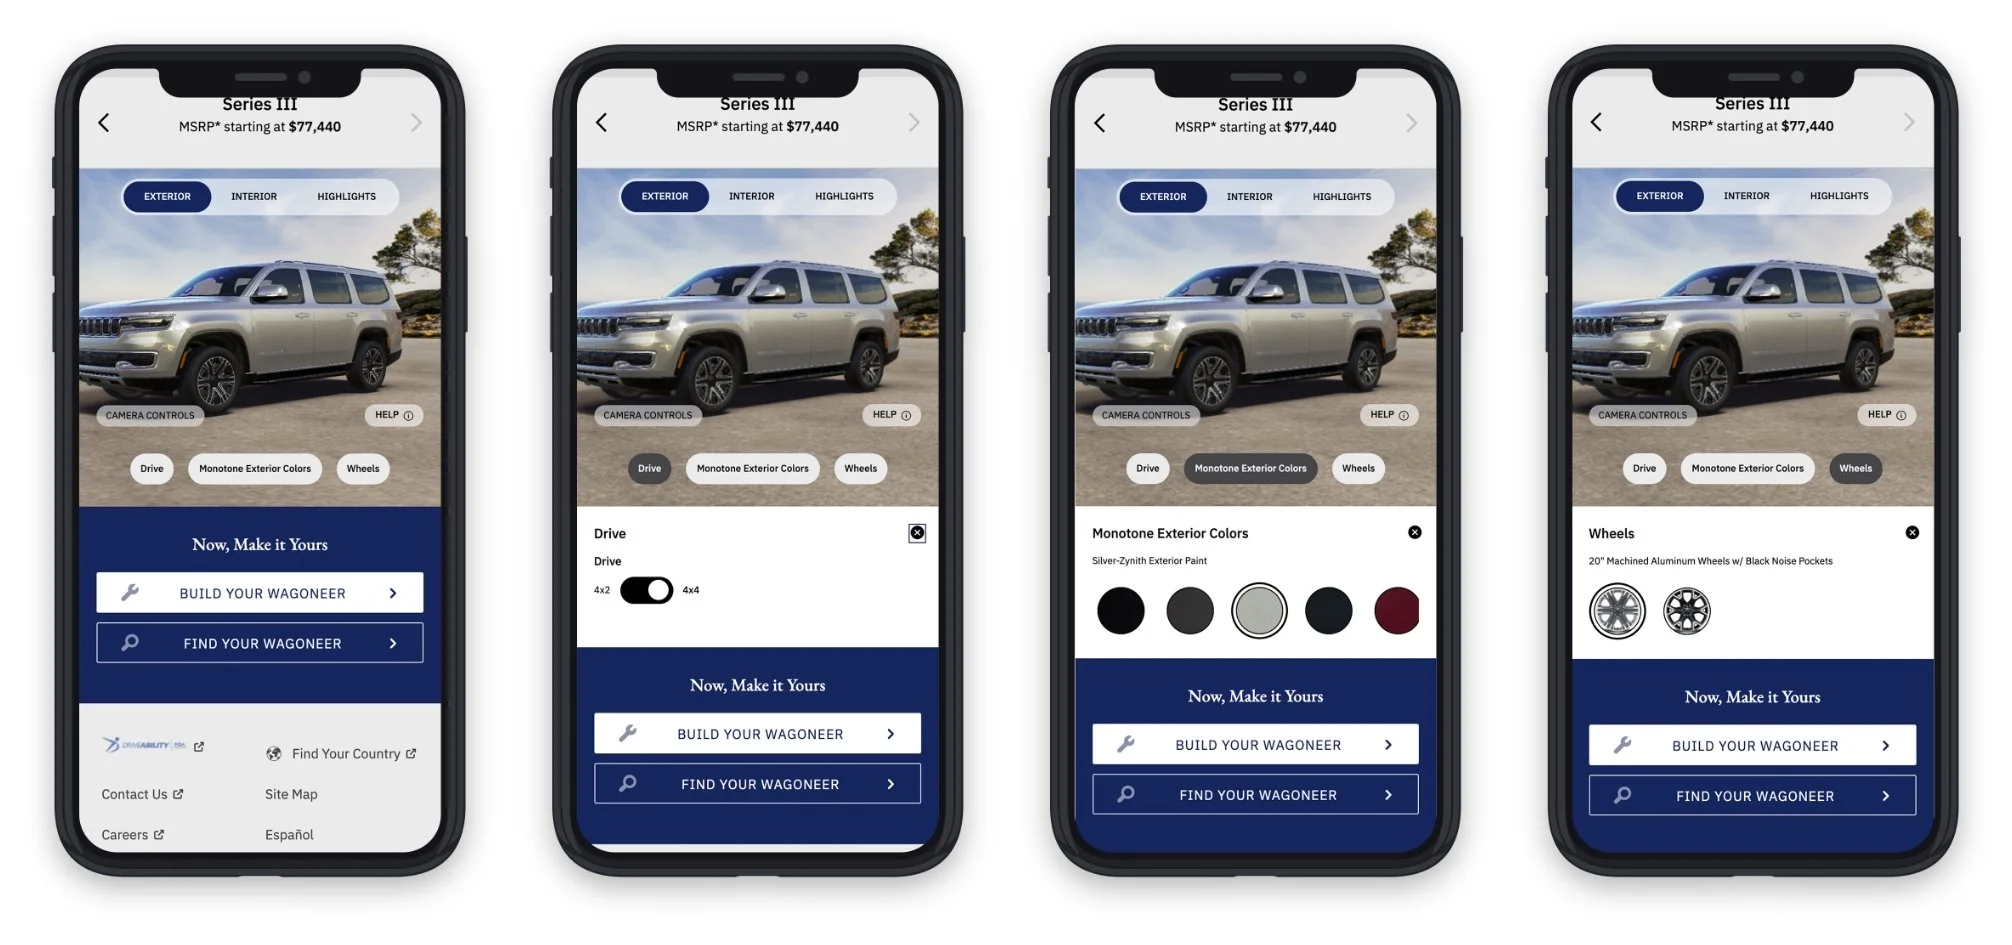
Exterior Configurator Demonstrations
3D View
Styling Options
Camera Angles
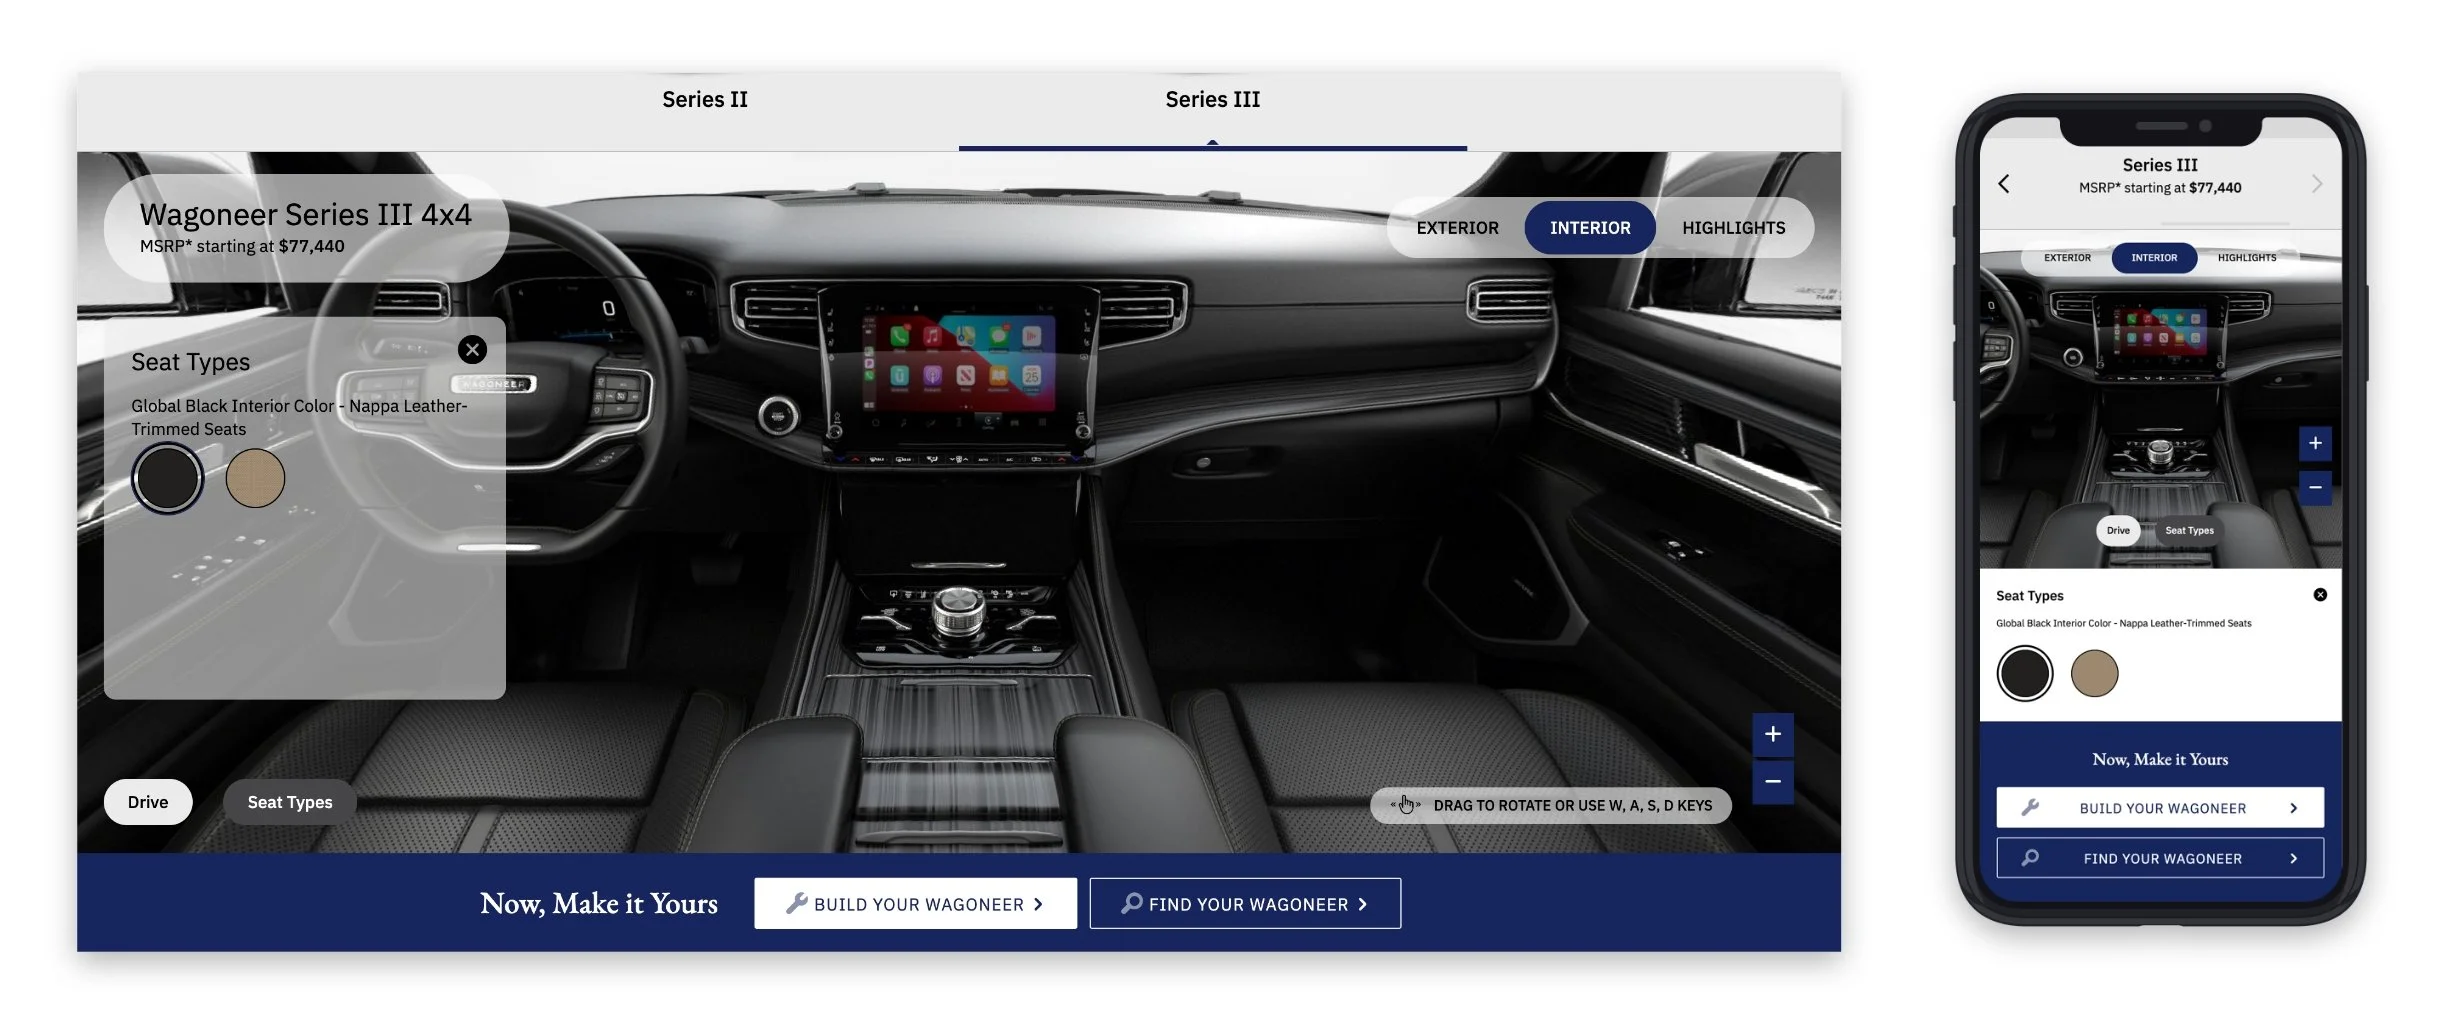
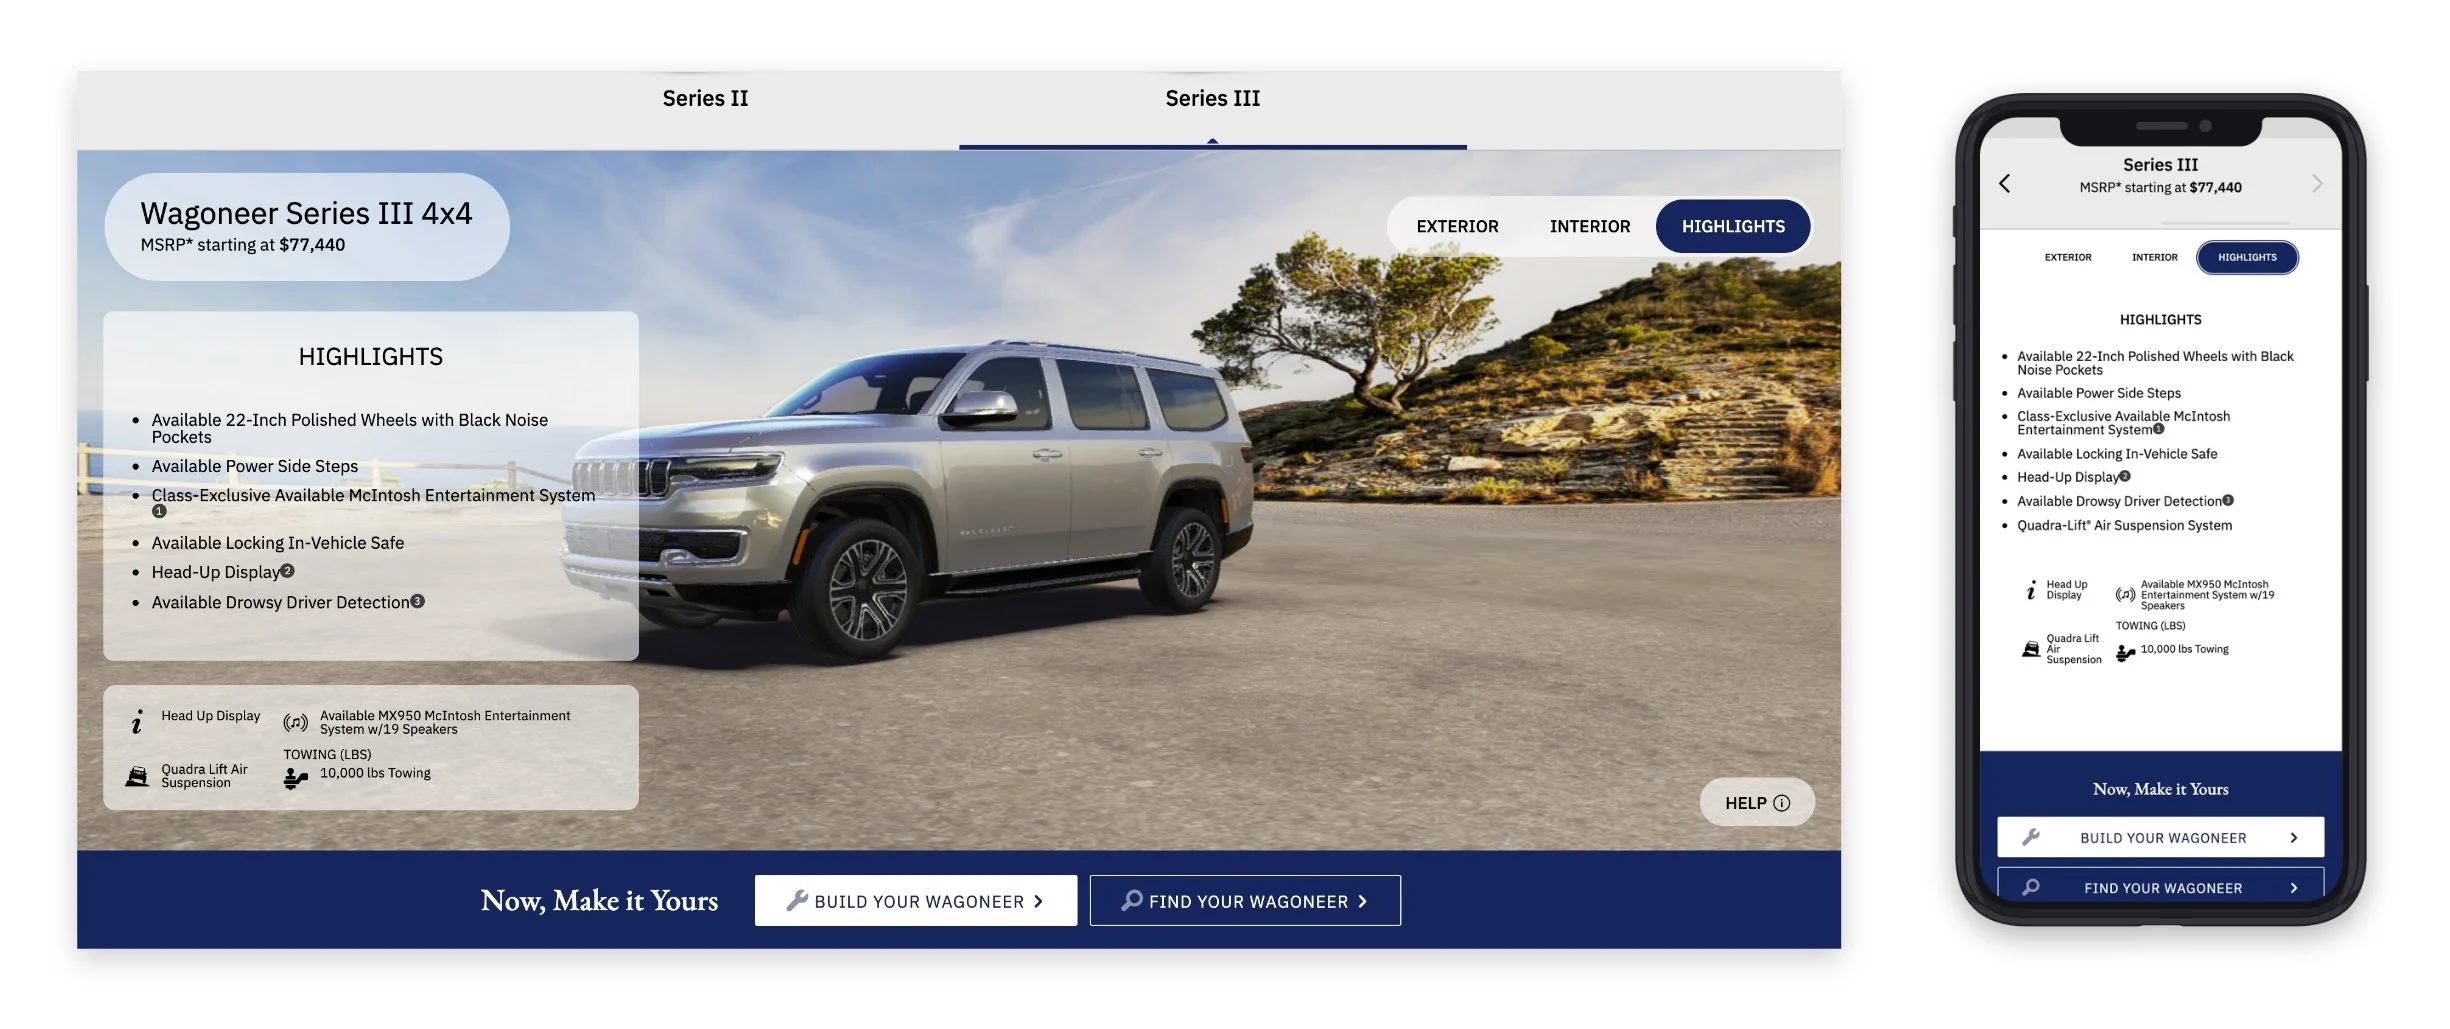
Interior & Highlights Tab
Conflict Resolution & Accessibility
During the development stage, we noticed it takes a significant amount of time for this configurator to load. We needed to come up with a creative solution to let the user know that the component is still loading so that they are aware of what is happening and does not leave the page assuming it is broken.
Since we were exploring ways to improve this experience and meet accessibility guidelines for both mouse and keyboard users, we came to a conclusion that it would be most ideal to use the loading time to provide them user guidelines.
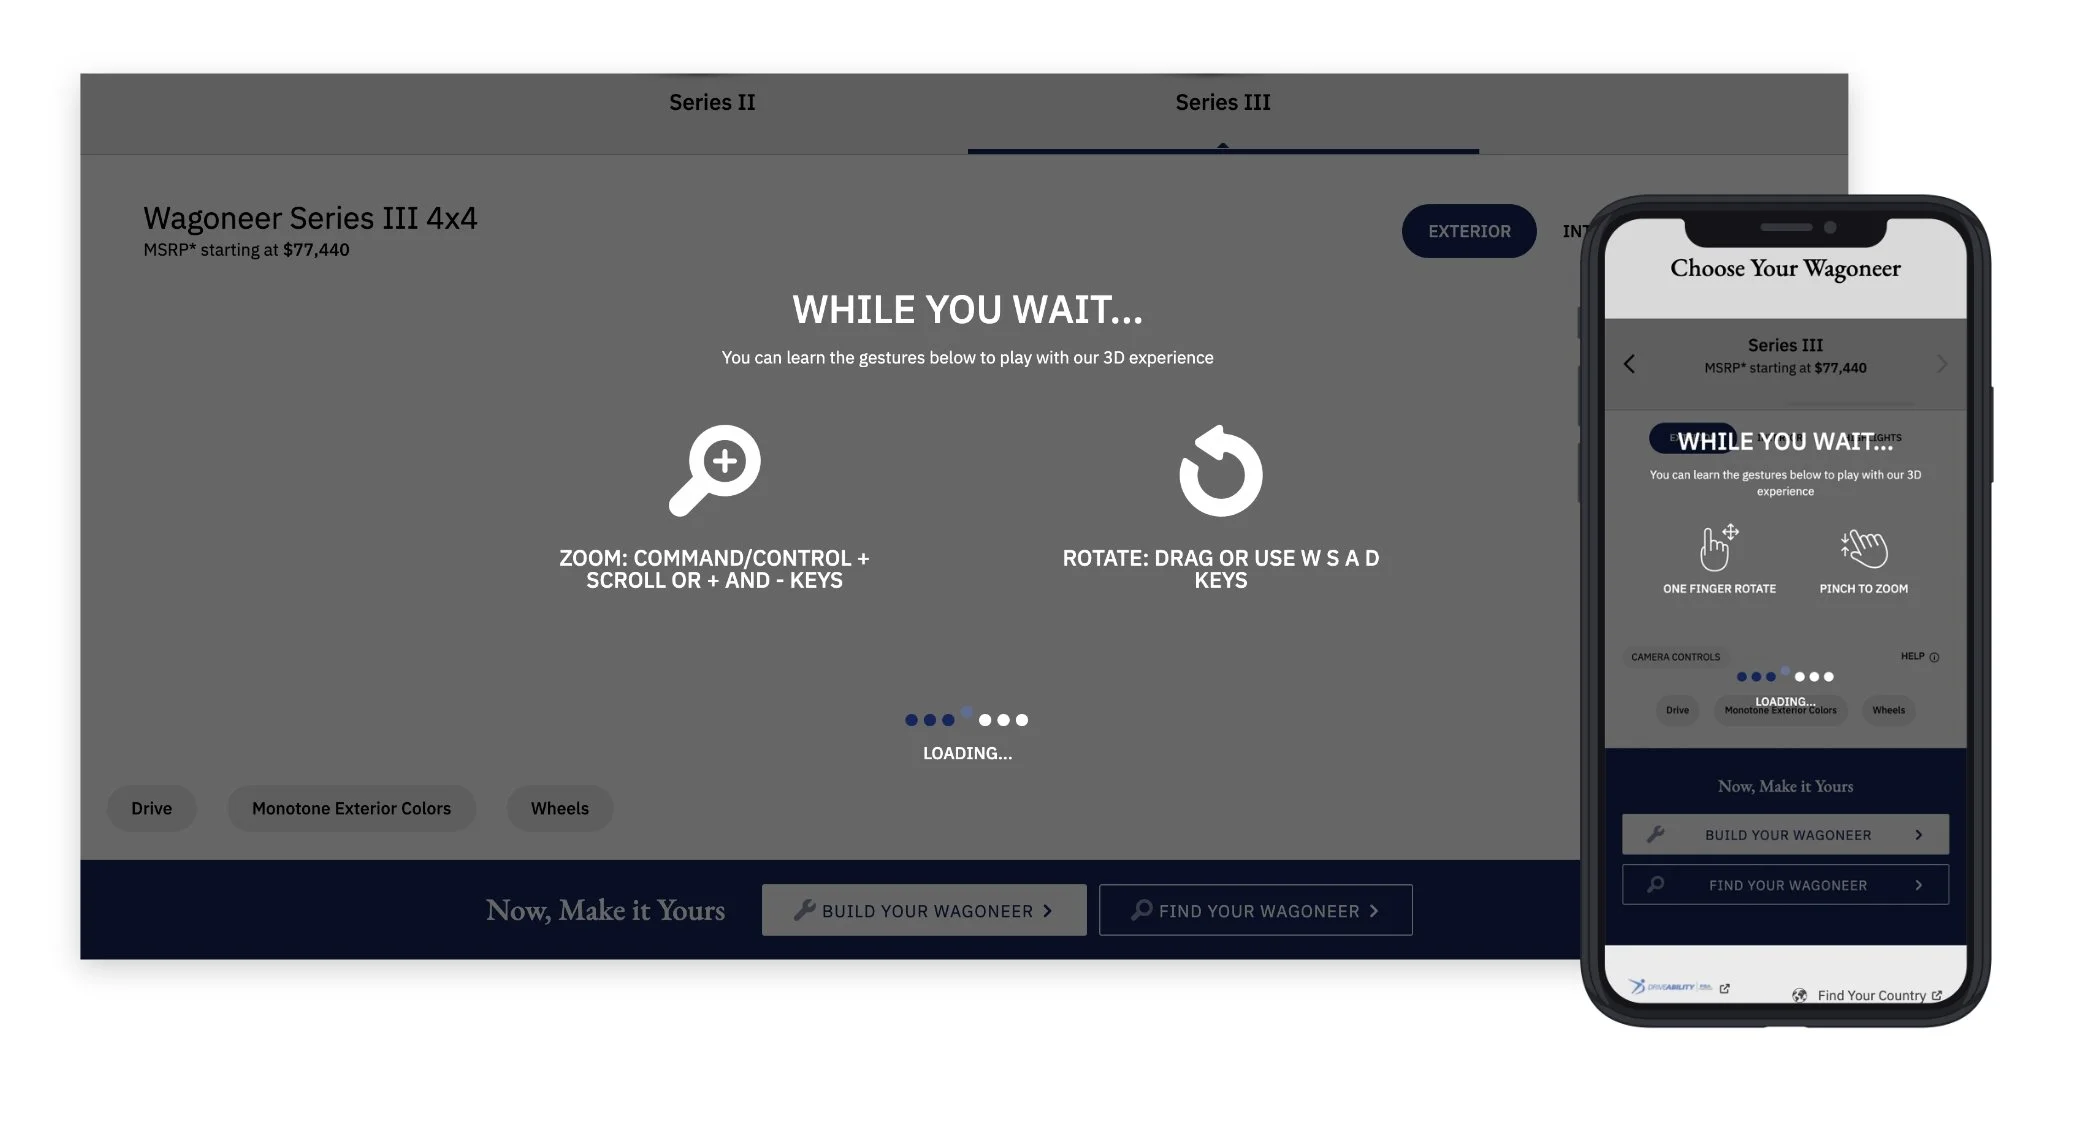
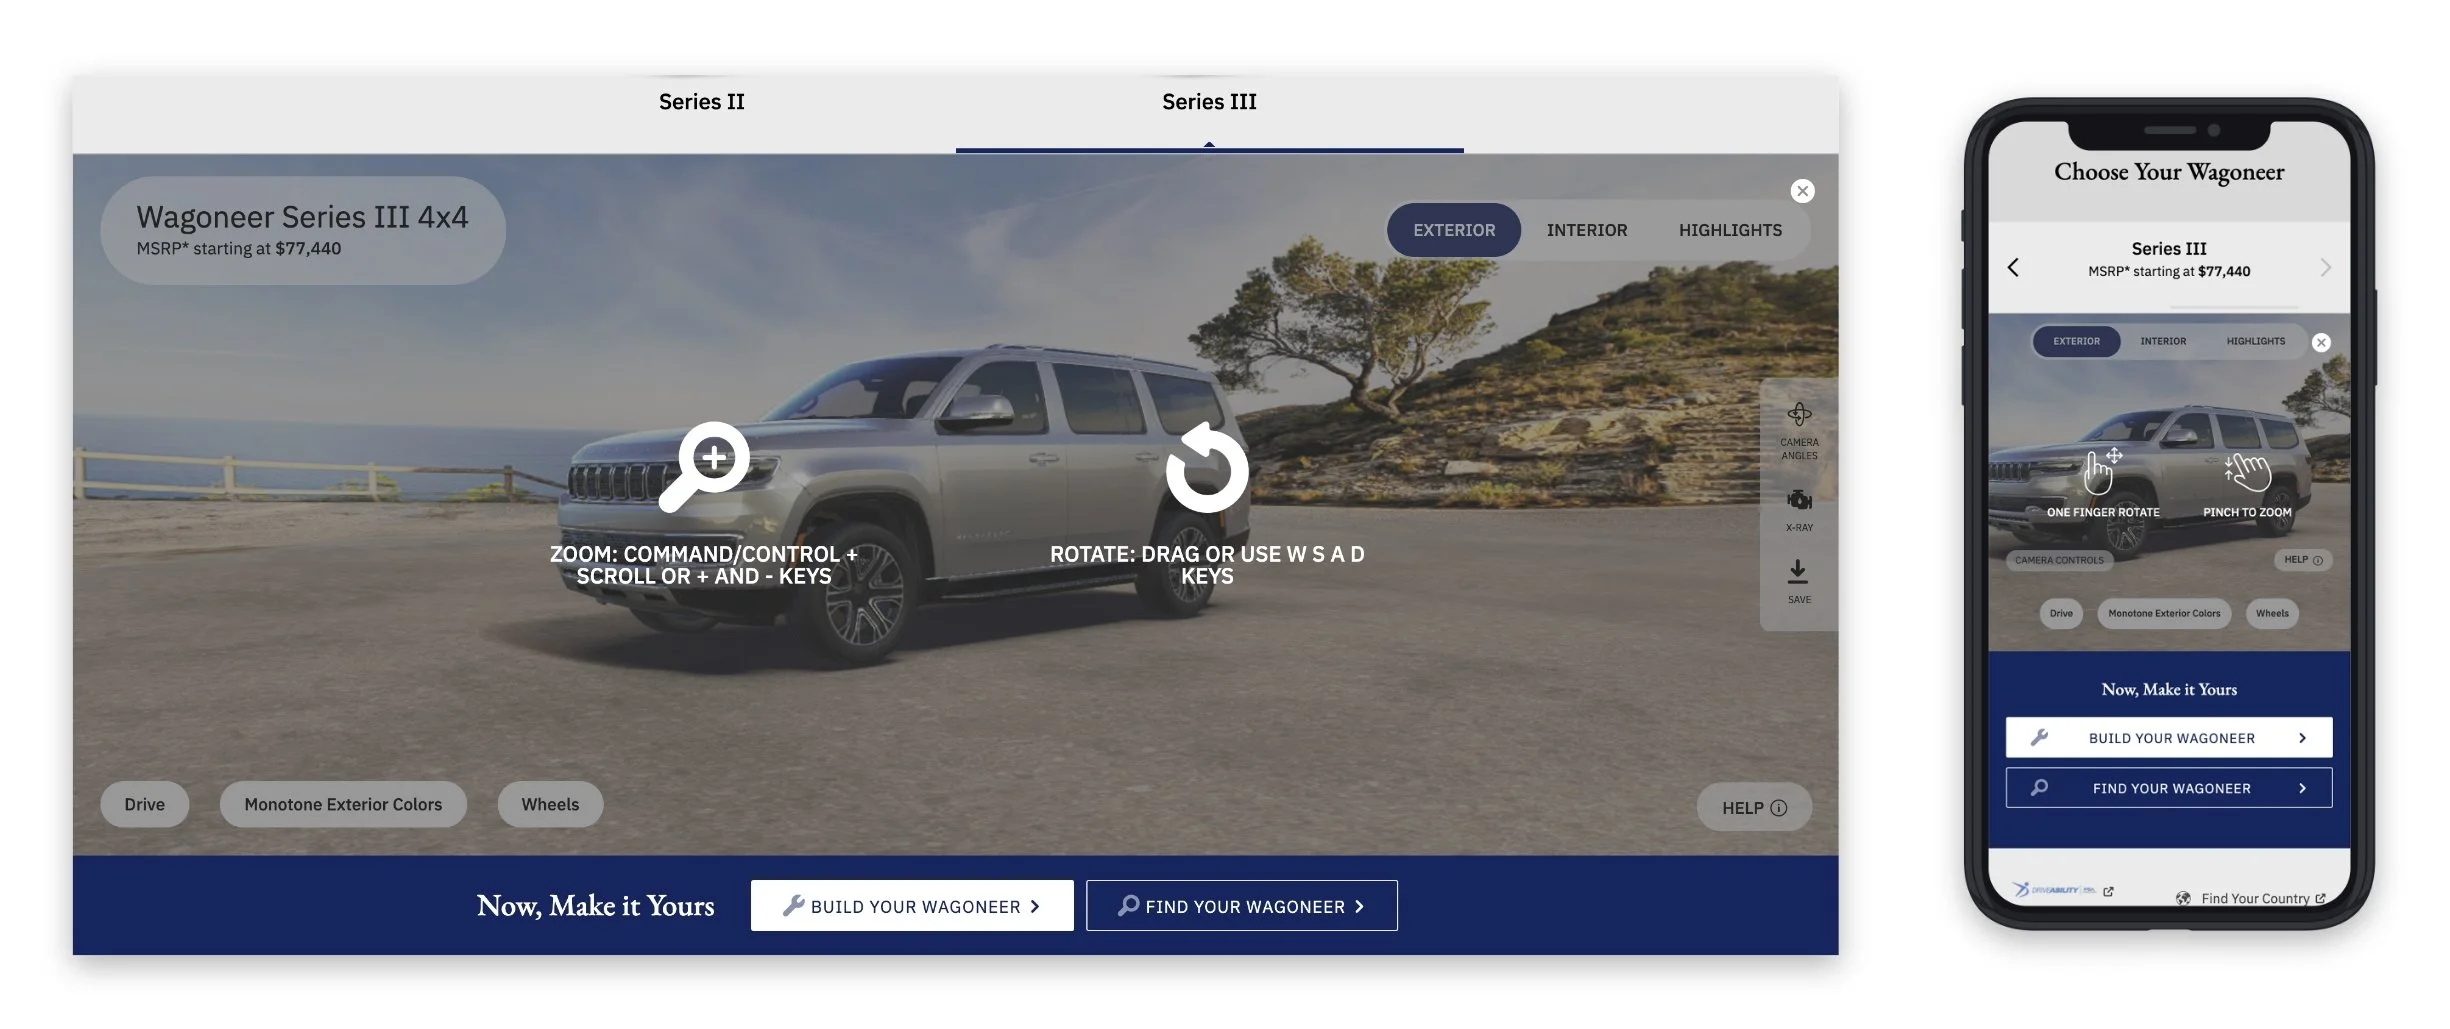
This instruction page is available when clicking/tapping on the “Help” button that is located on the bottom right corner of the configurator after it has finished loading.
The Outcome
Below are the final designs of the component for Jeep and Wagoneer. This will soon be available for Chrysler, Dodge, Ram, Fiat and Alfa Romeo.